Discovering Fablabs, 3D Printing, and Embedded AI

Welcome to this immersive workshop where you will explore Fablabs, 3D printing, and embedded AI. Get ready to dive into a world of creativity, innovation, and artificial intelligence!
Introduction to Fablabs and 3D Printing
What is a Fablab?
A Fablab, or "Fabrication Laboratory," is a collaborative space where anyone can come to create, learn, and share. Initiated by MIT in the 2000s, this concept provides access to digital fabrication tools such as 3D printers, laser cutters, and more. Fablabs are places where ideas come to life through technology and innovation.
Machines in the Fablab
Our Fablab is equipped with various machines to meet all your creative needs:
- 3D Printers: For manufacturing prototypes and plastic parts.
- Laser Cutter: For cutting and engraving wood, plastic, and fabric.
- CNC Milling Machine: For precision machining of wood, metal, or plastic parts.
- Electronics Workspace: Equipped to create circuits and electronic projects.
Fablab Projects
Discover some projects realized in our Fablab:
- Stress Tests: Printing various objects to test material quality.
- Workspace Improvements: Creating storage solutions and drawer organizers.
- Custom Trophies: Manufacturing trophies for a competition.
- Electronic Boards: Developing and assembling electronic boards for internal projects.
Dive into 3D Printing
Filaments for 3D Printing
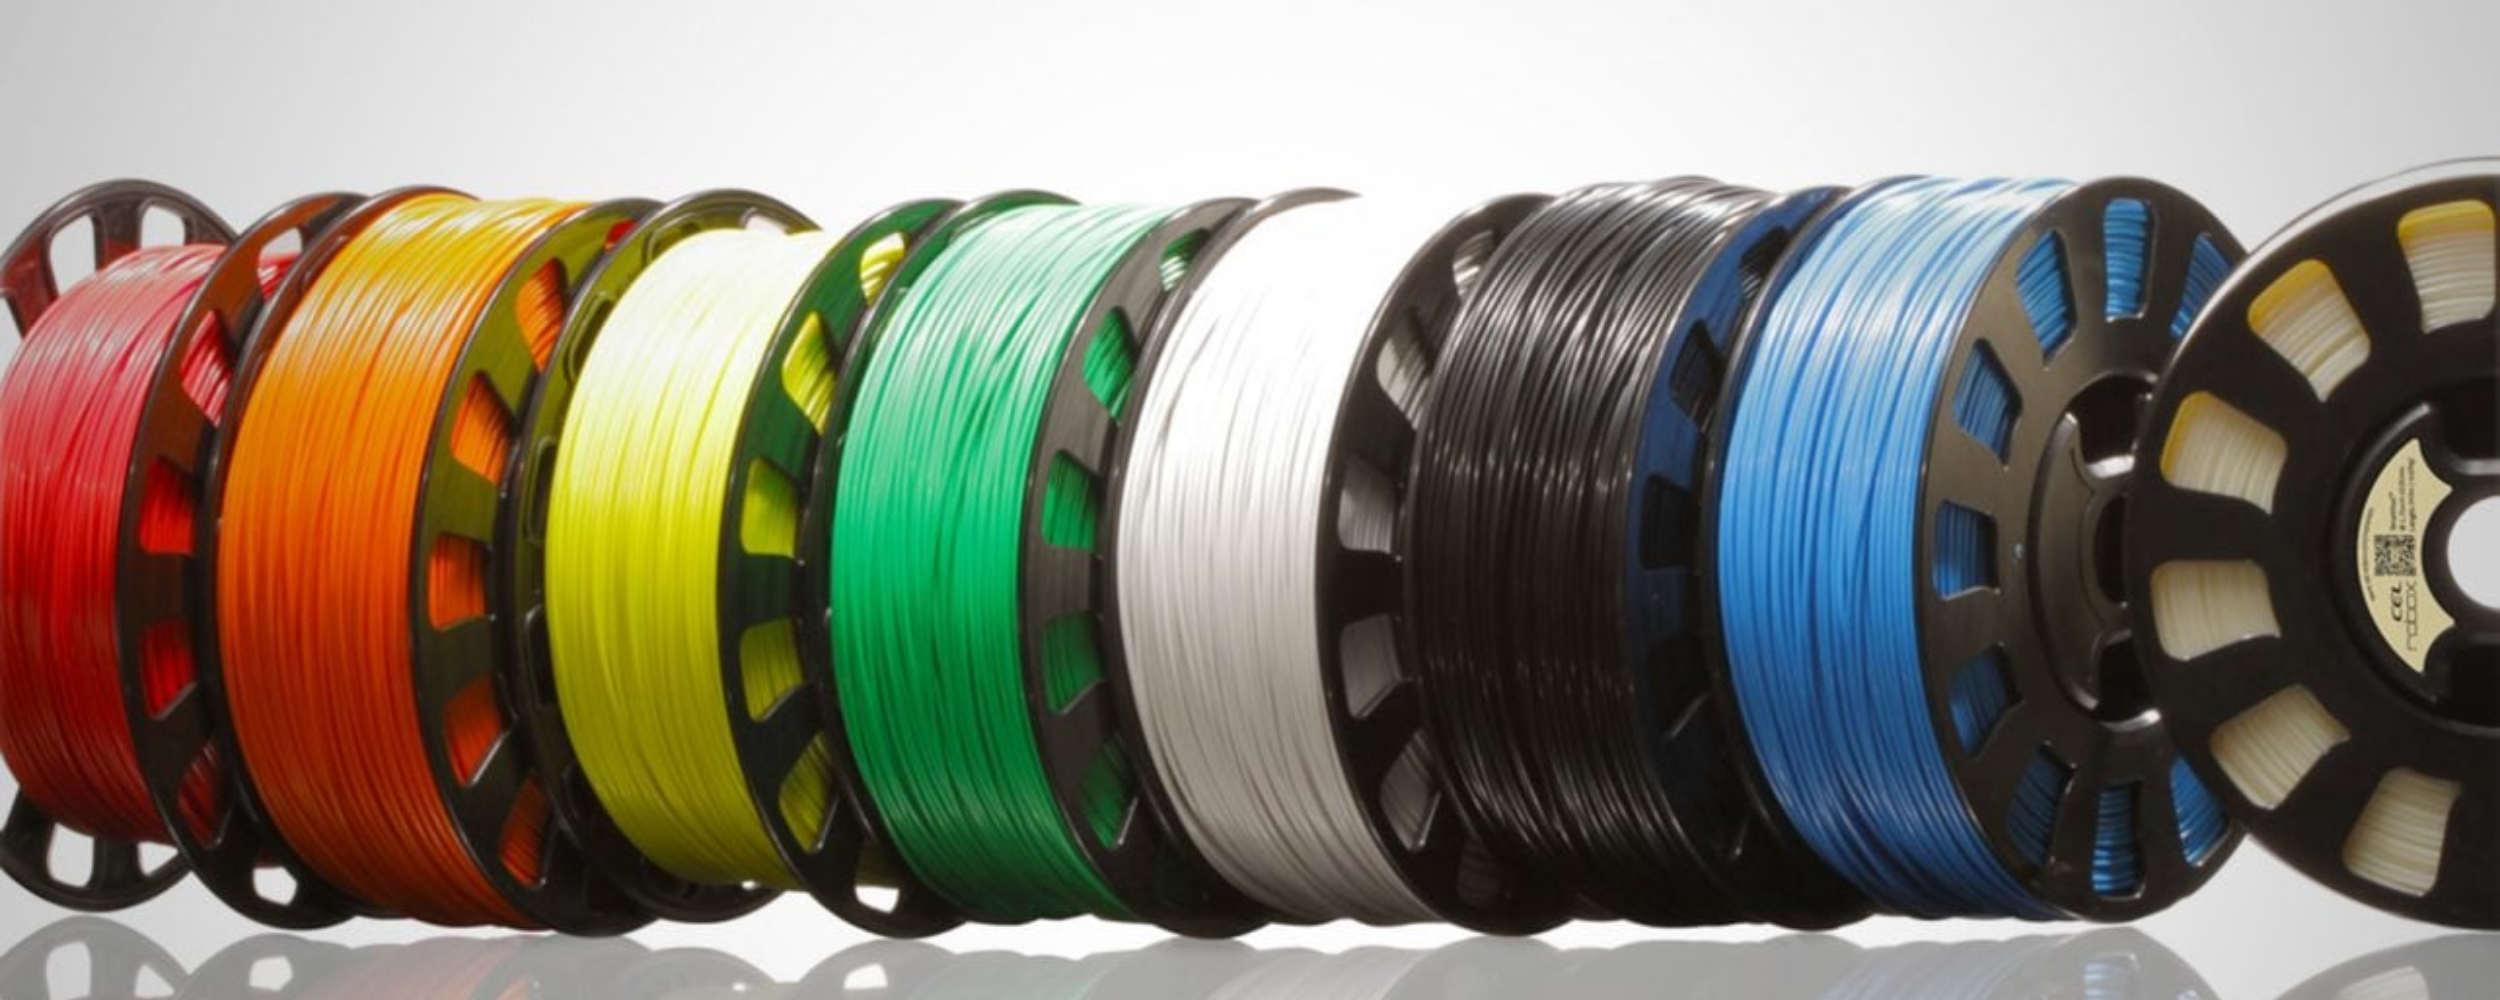
Here is a summary table of the different types of filaments used in 3D printing:
| Material | Type | Easy to Print | Resistant | Durable | Requires Enclosure | Flexible | UV Resistant |
|---|---|---|---|---|---|---|---|
| PLA | Standard | ✔️ | ✔️ | ✔️ | ❌ | ❌ | ❌ |
| PETG | Standard | ✔️ | ✔️ | ✔️ | ✔️ | ❌ | ❌ |
| ABS | Standard | ✔️ | ✔️ | ✔️ | ✔️ | ❌ | ❌ |
| Flex | Technical | ✔️ | ✔️ | ✔️ | ❌ | ✔️ | ❌ |
| Nylon | Technical | ✔️ | ✔️ | ✔️ | ✔️ | ❌ | ❌ |
| ASA | Technical | ✔️ | ✔️ | ✔️ | ✔️ | ❌ | ✔️ |
| Polycarbonate | Technical | ✔️ | ✔️ | ✔️ | ✔️ | ❌ | ❌ |
| Carbon Fiber | Composite | ✔️ | ✔️ | ❌ | ❌ | ❌ | ❌ |
| Metal | Composite | ✔️ | ✔️ | ❌ | ❌ | ❌ | ❌ |
| Wood | Composite | ✔️ | ❌ | ❌ | ❌ | ❌ | ❌ |
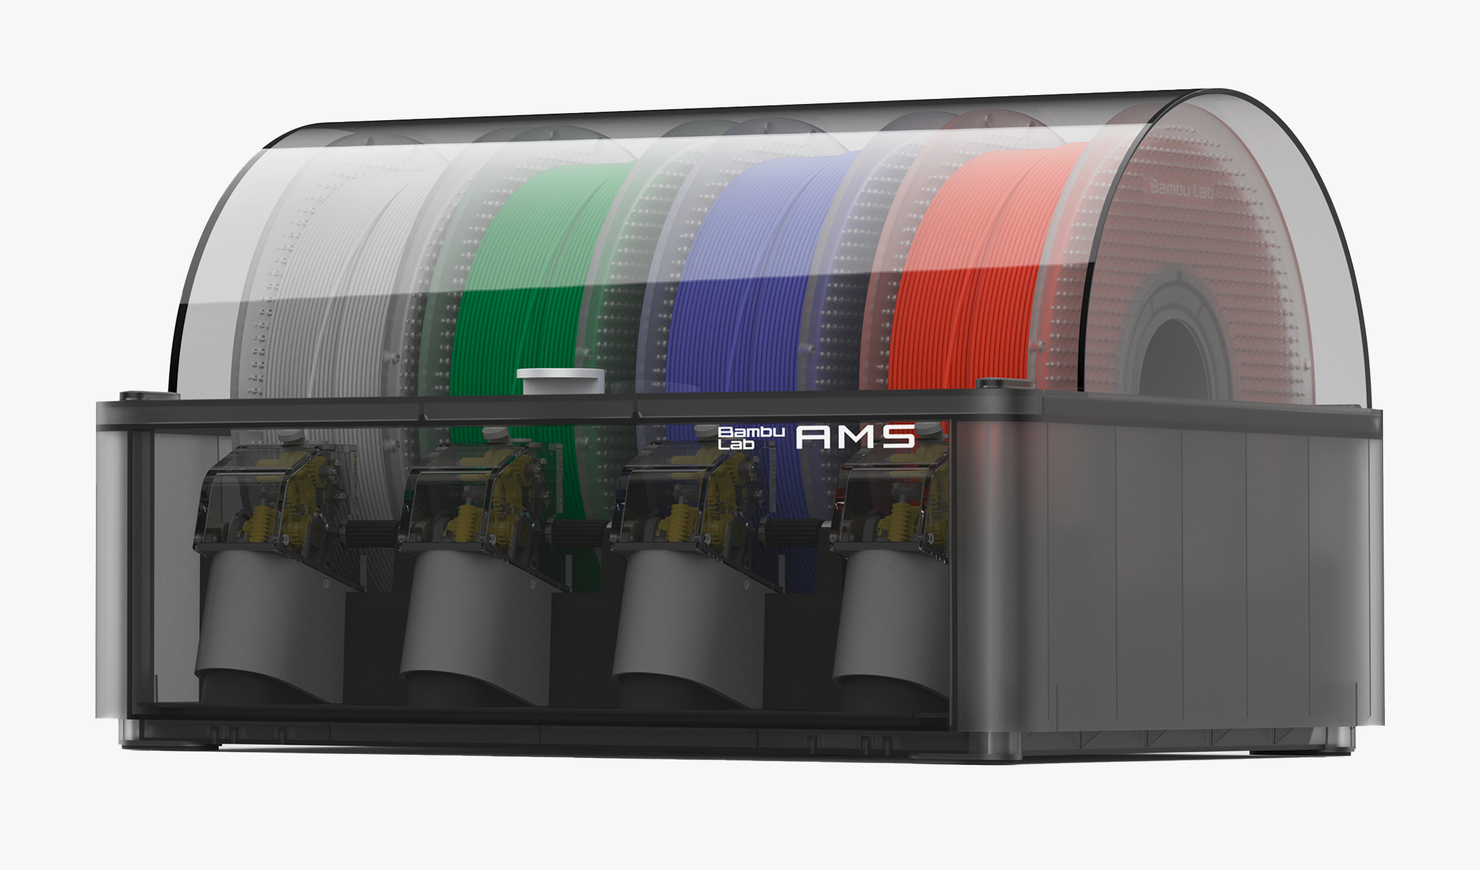
The AMS System by Bambulab
The AMS system from Bambulab allows 3D printing with up to four different filaments without manual spool changes. It uses automatic filament recognition (RFID) and automatic spool changing (ABC). The AMS is also equipped with a filament drying system to improve print quality.
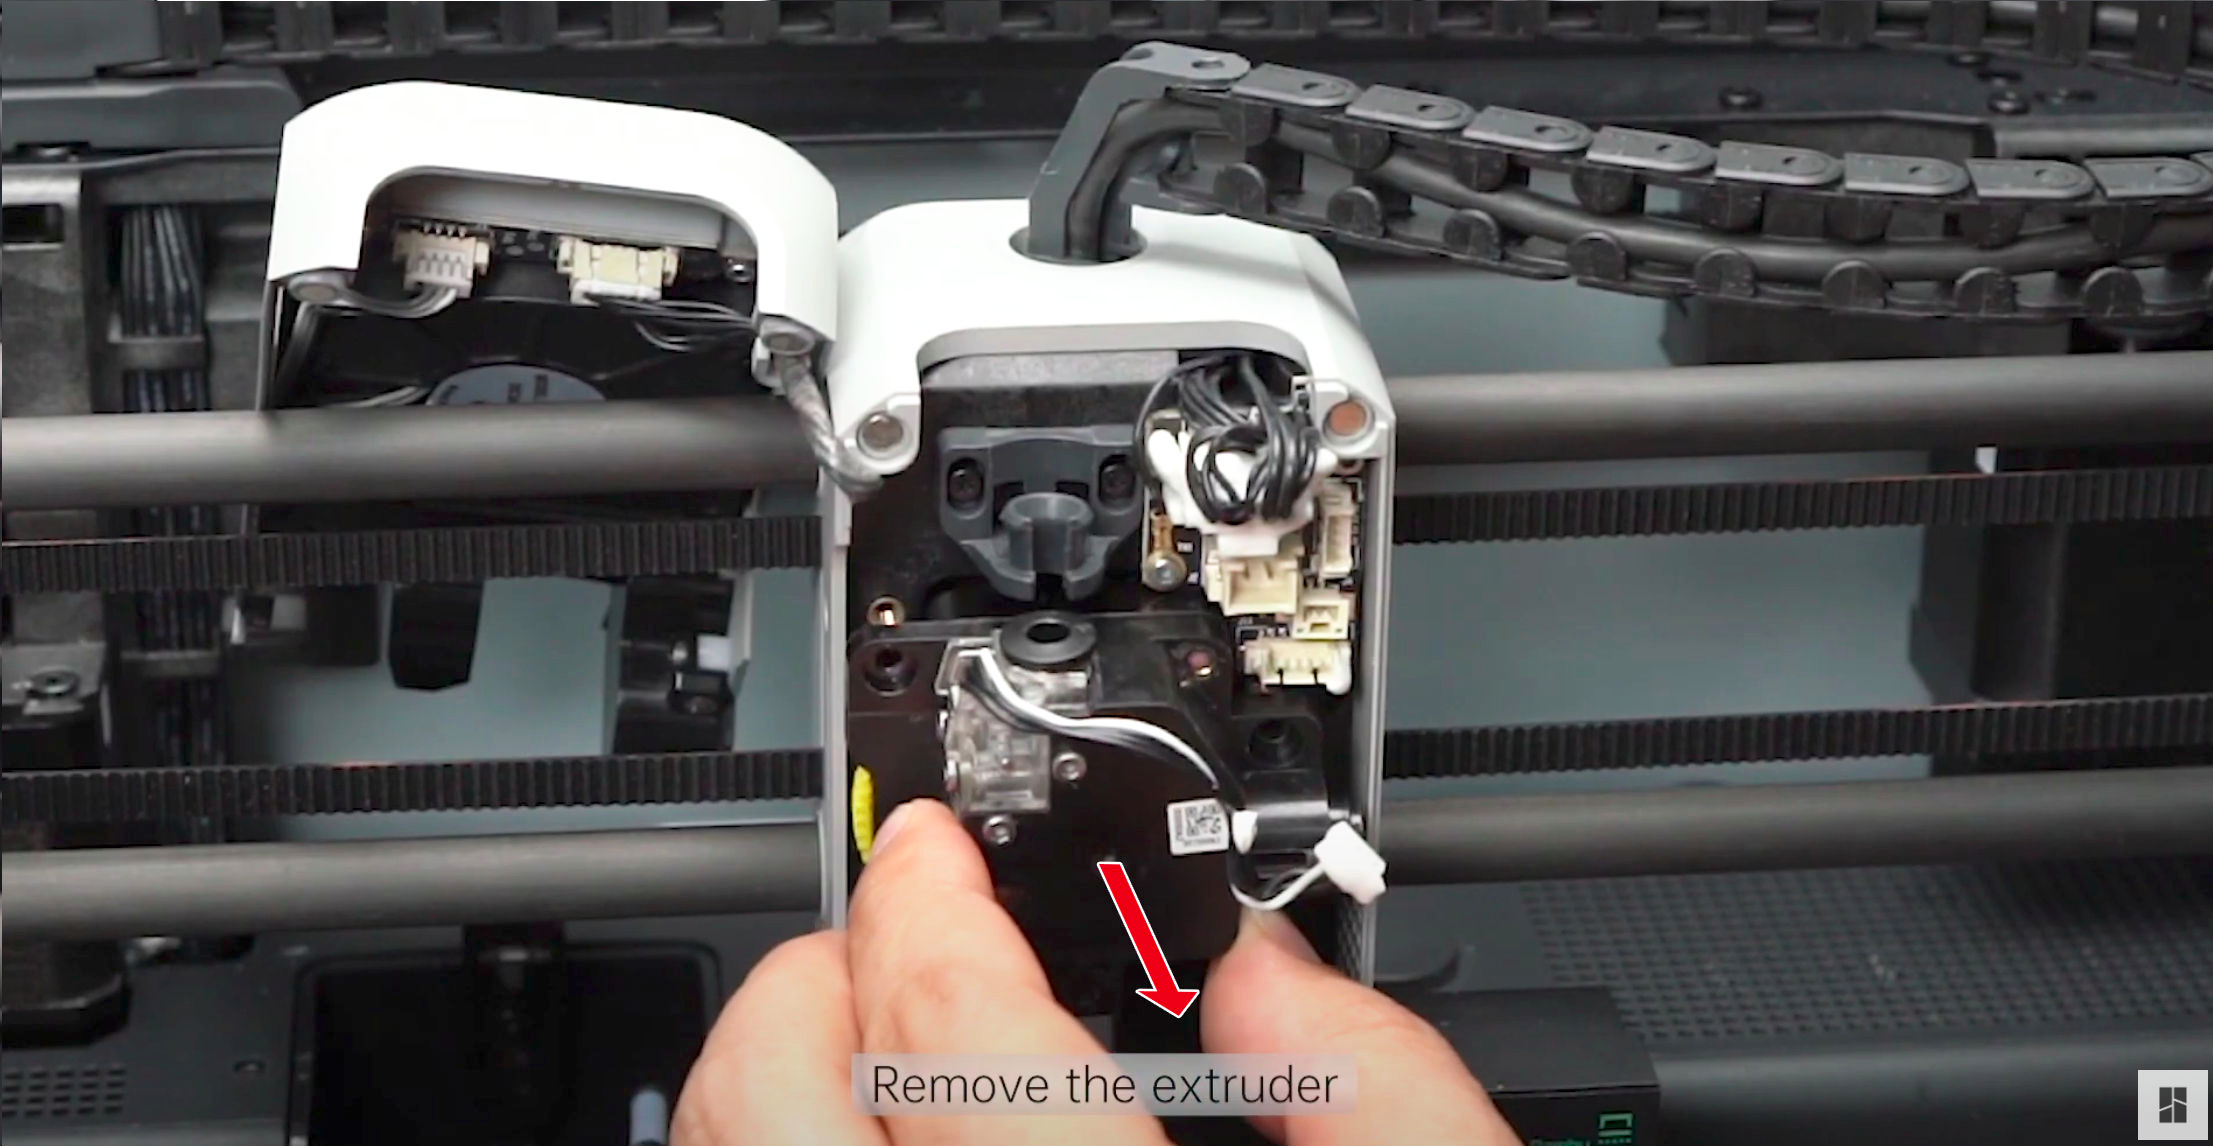
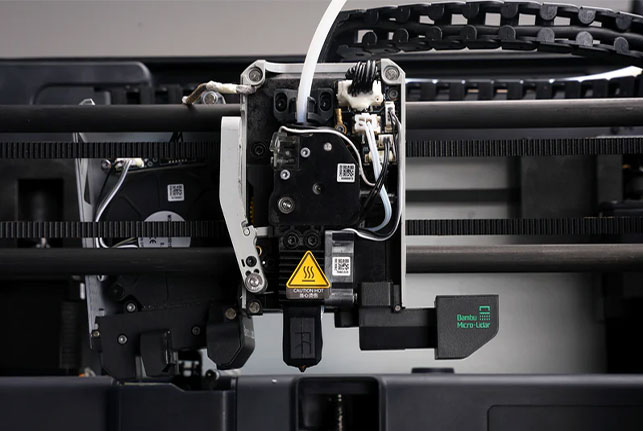
The Extruder
The extruder pulls the filament and feeds it into the heated body. The extruder of the Bambulab X1 Carbon is a direct extruder, located above the print bed, offering better control over the filament’s temperature and pressure.
The Heated Body
The filament enters the heated body, where it is melted and extruded through the nozzle. The heated body is equipped with a heating cartridge and a temperature sensor to control the filament temperature.
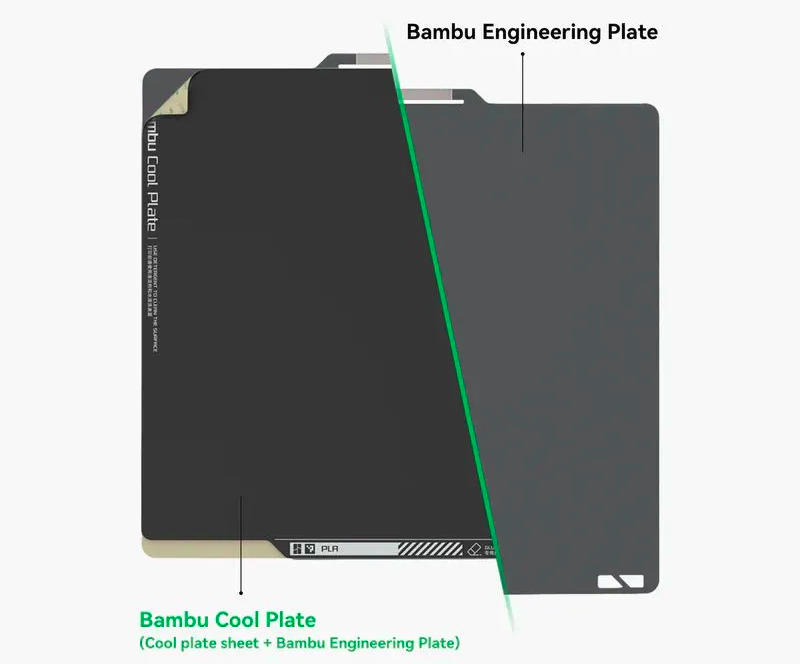
The Build Plate
The build plate is the surface on which the print is made. It is heated to improve filament adhesion and can be textured or equipped with removable surfaces to facilitate print removal.
Slicing Software
A slicer converts your 3D model into printing instructions. In this guide, we will use OrcaSlicer, an advanced slicer compatible with most 3D printers.
Importing Your 3D Model
- Download a 3D model from platforms like MakerWorld, Printables, Thingiverse, Cults, or MyMiniFactory.
- Import the model into OrcaSlicer by clicking on "Import."
Creating the Printing Context
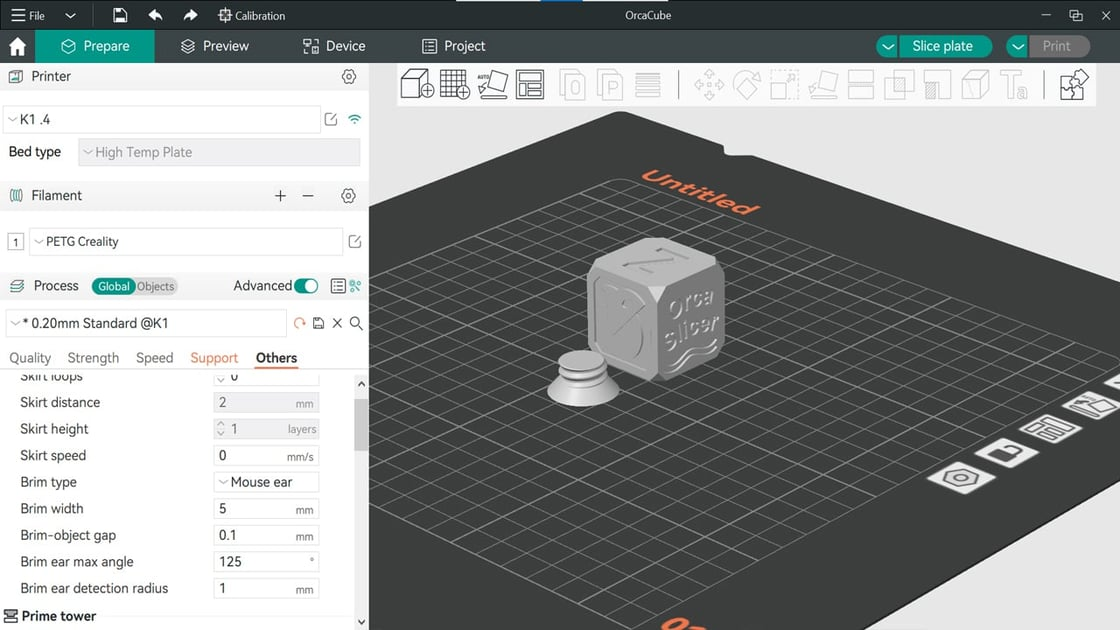
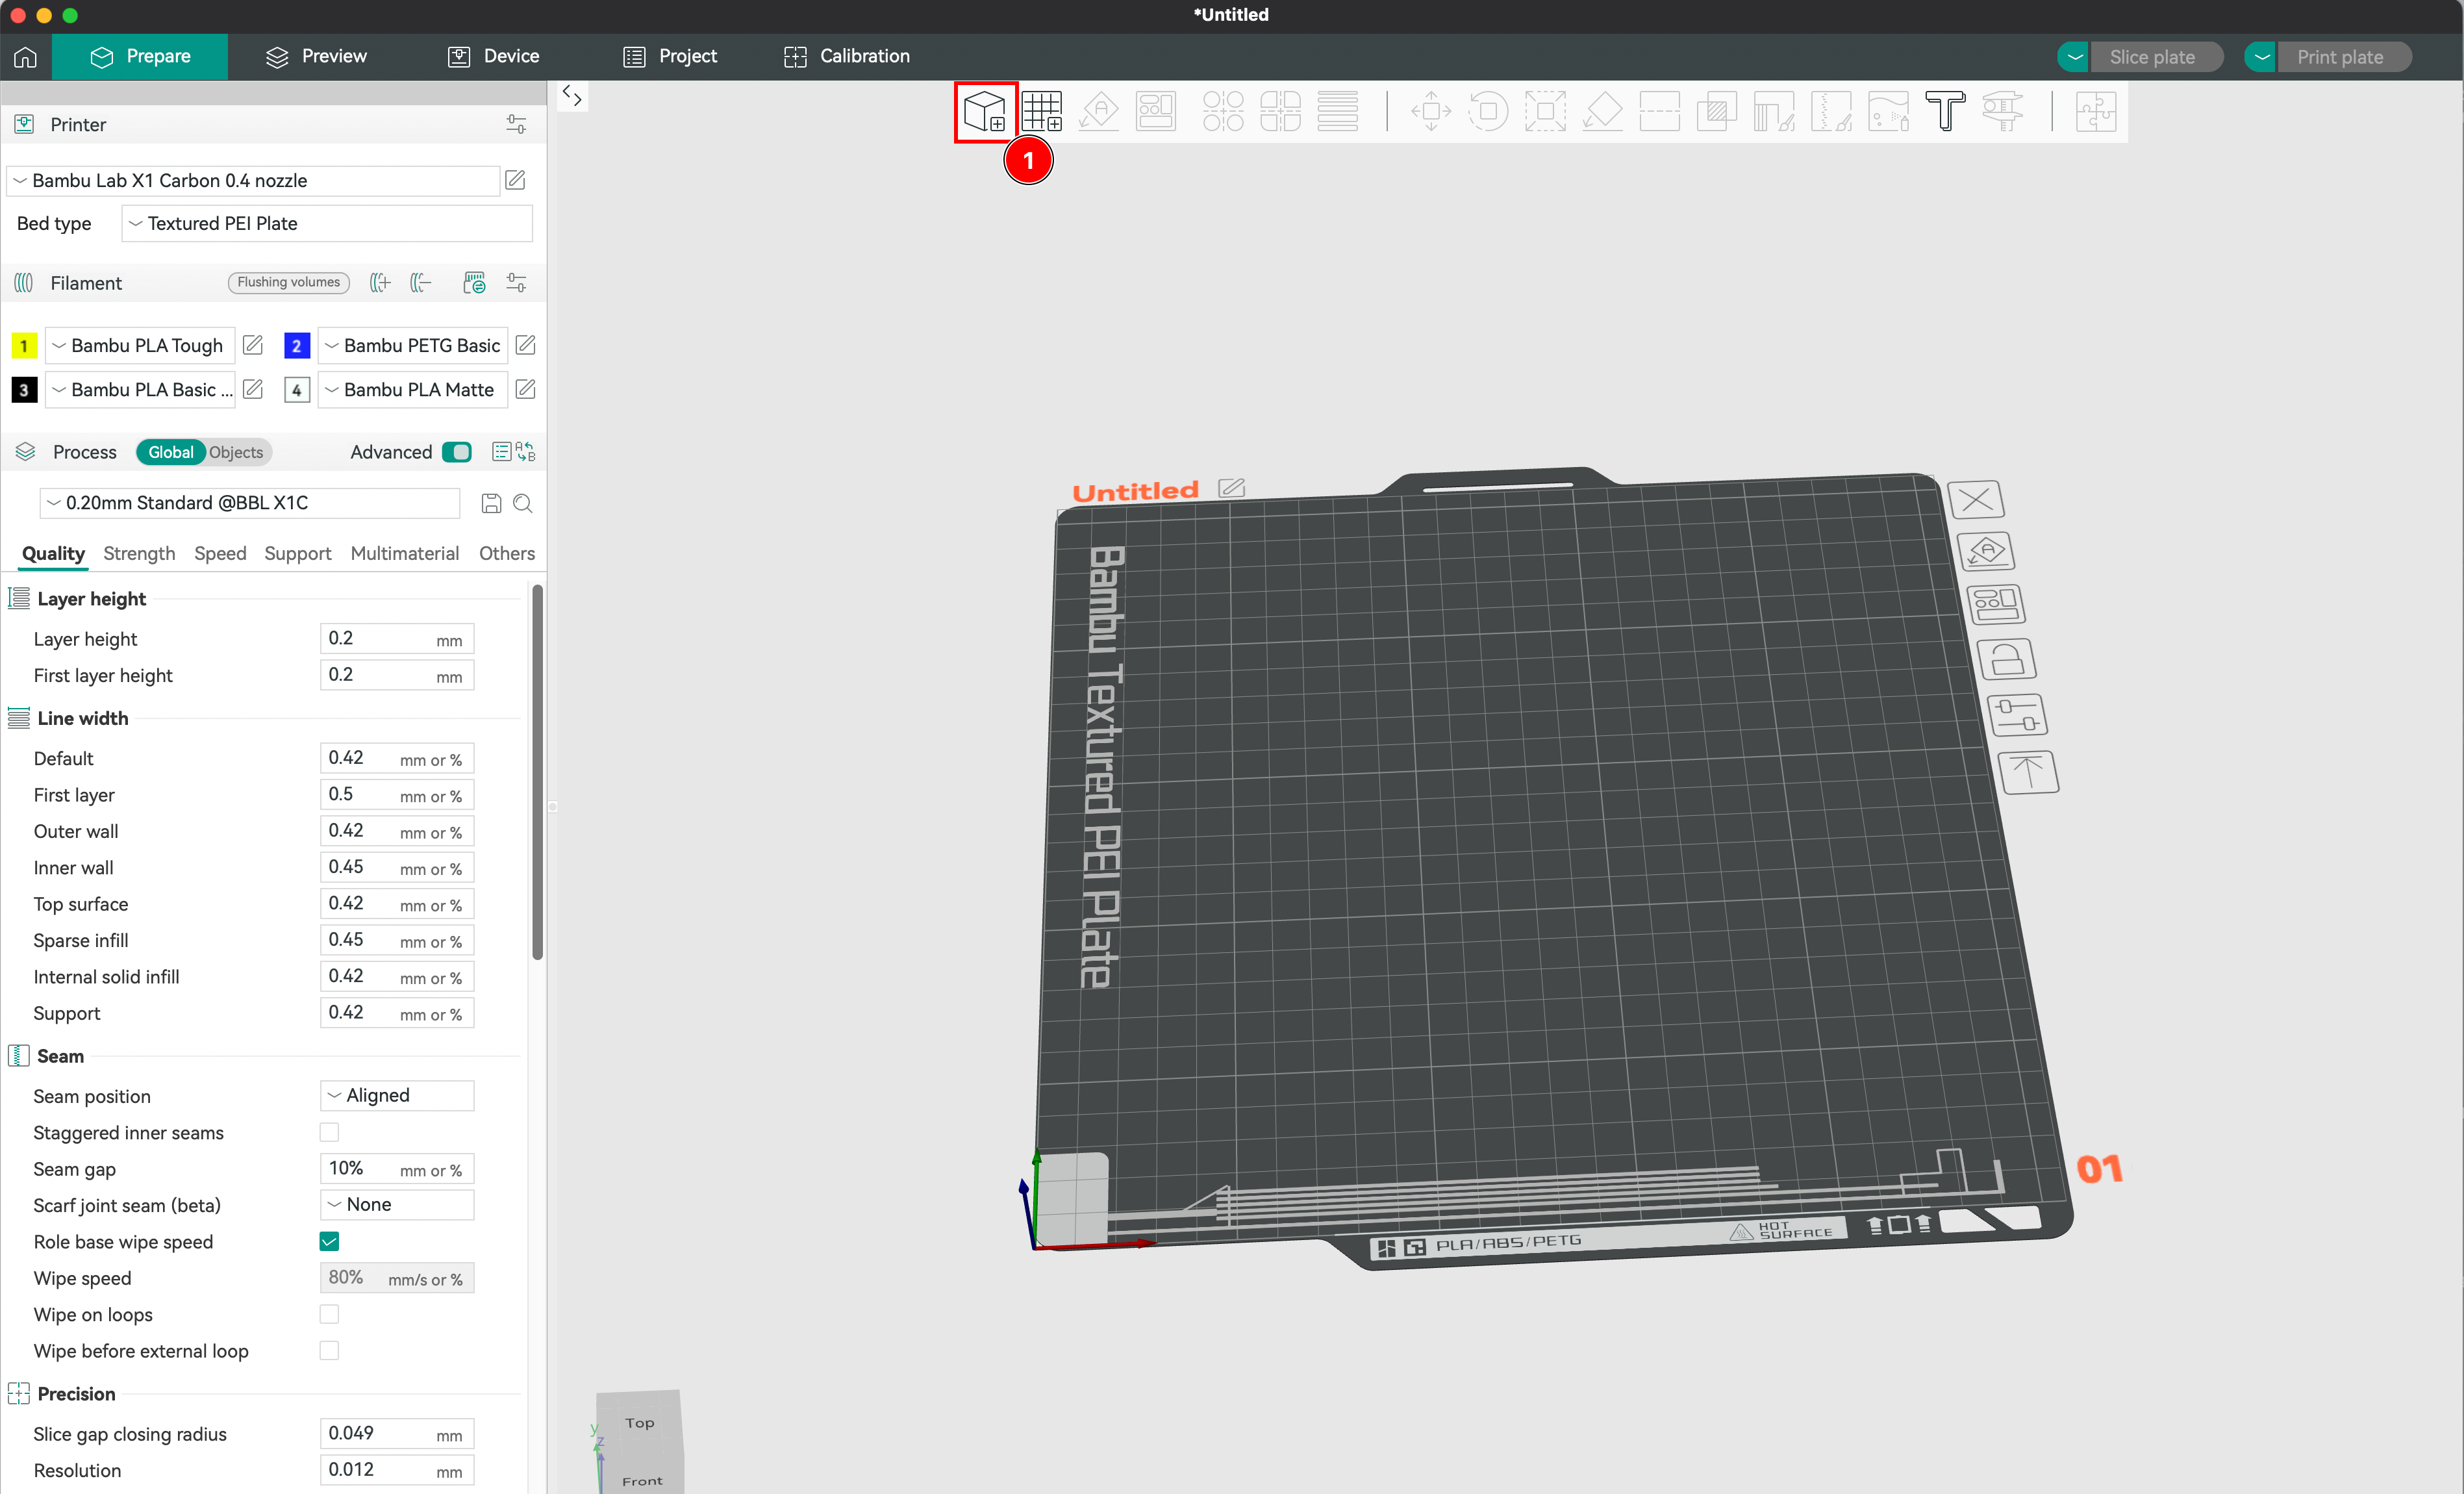
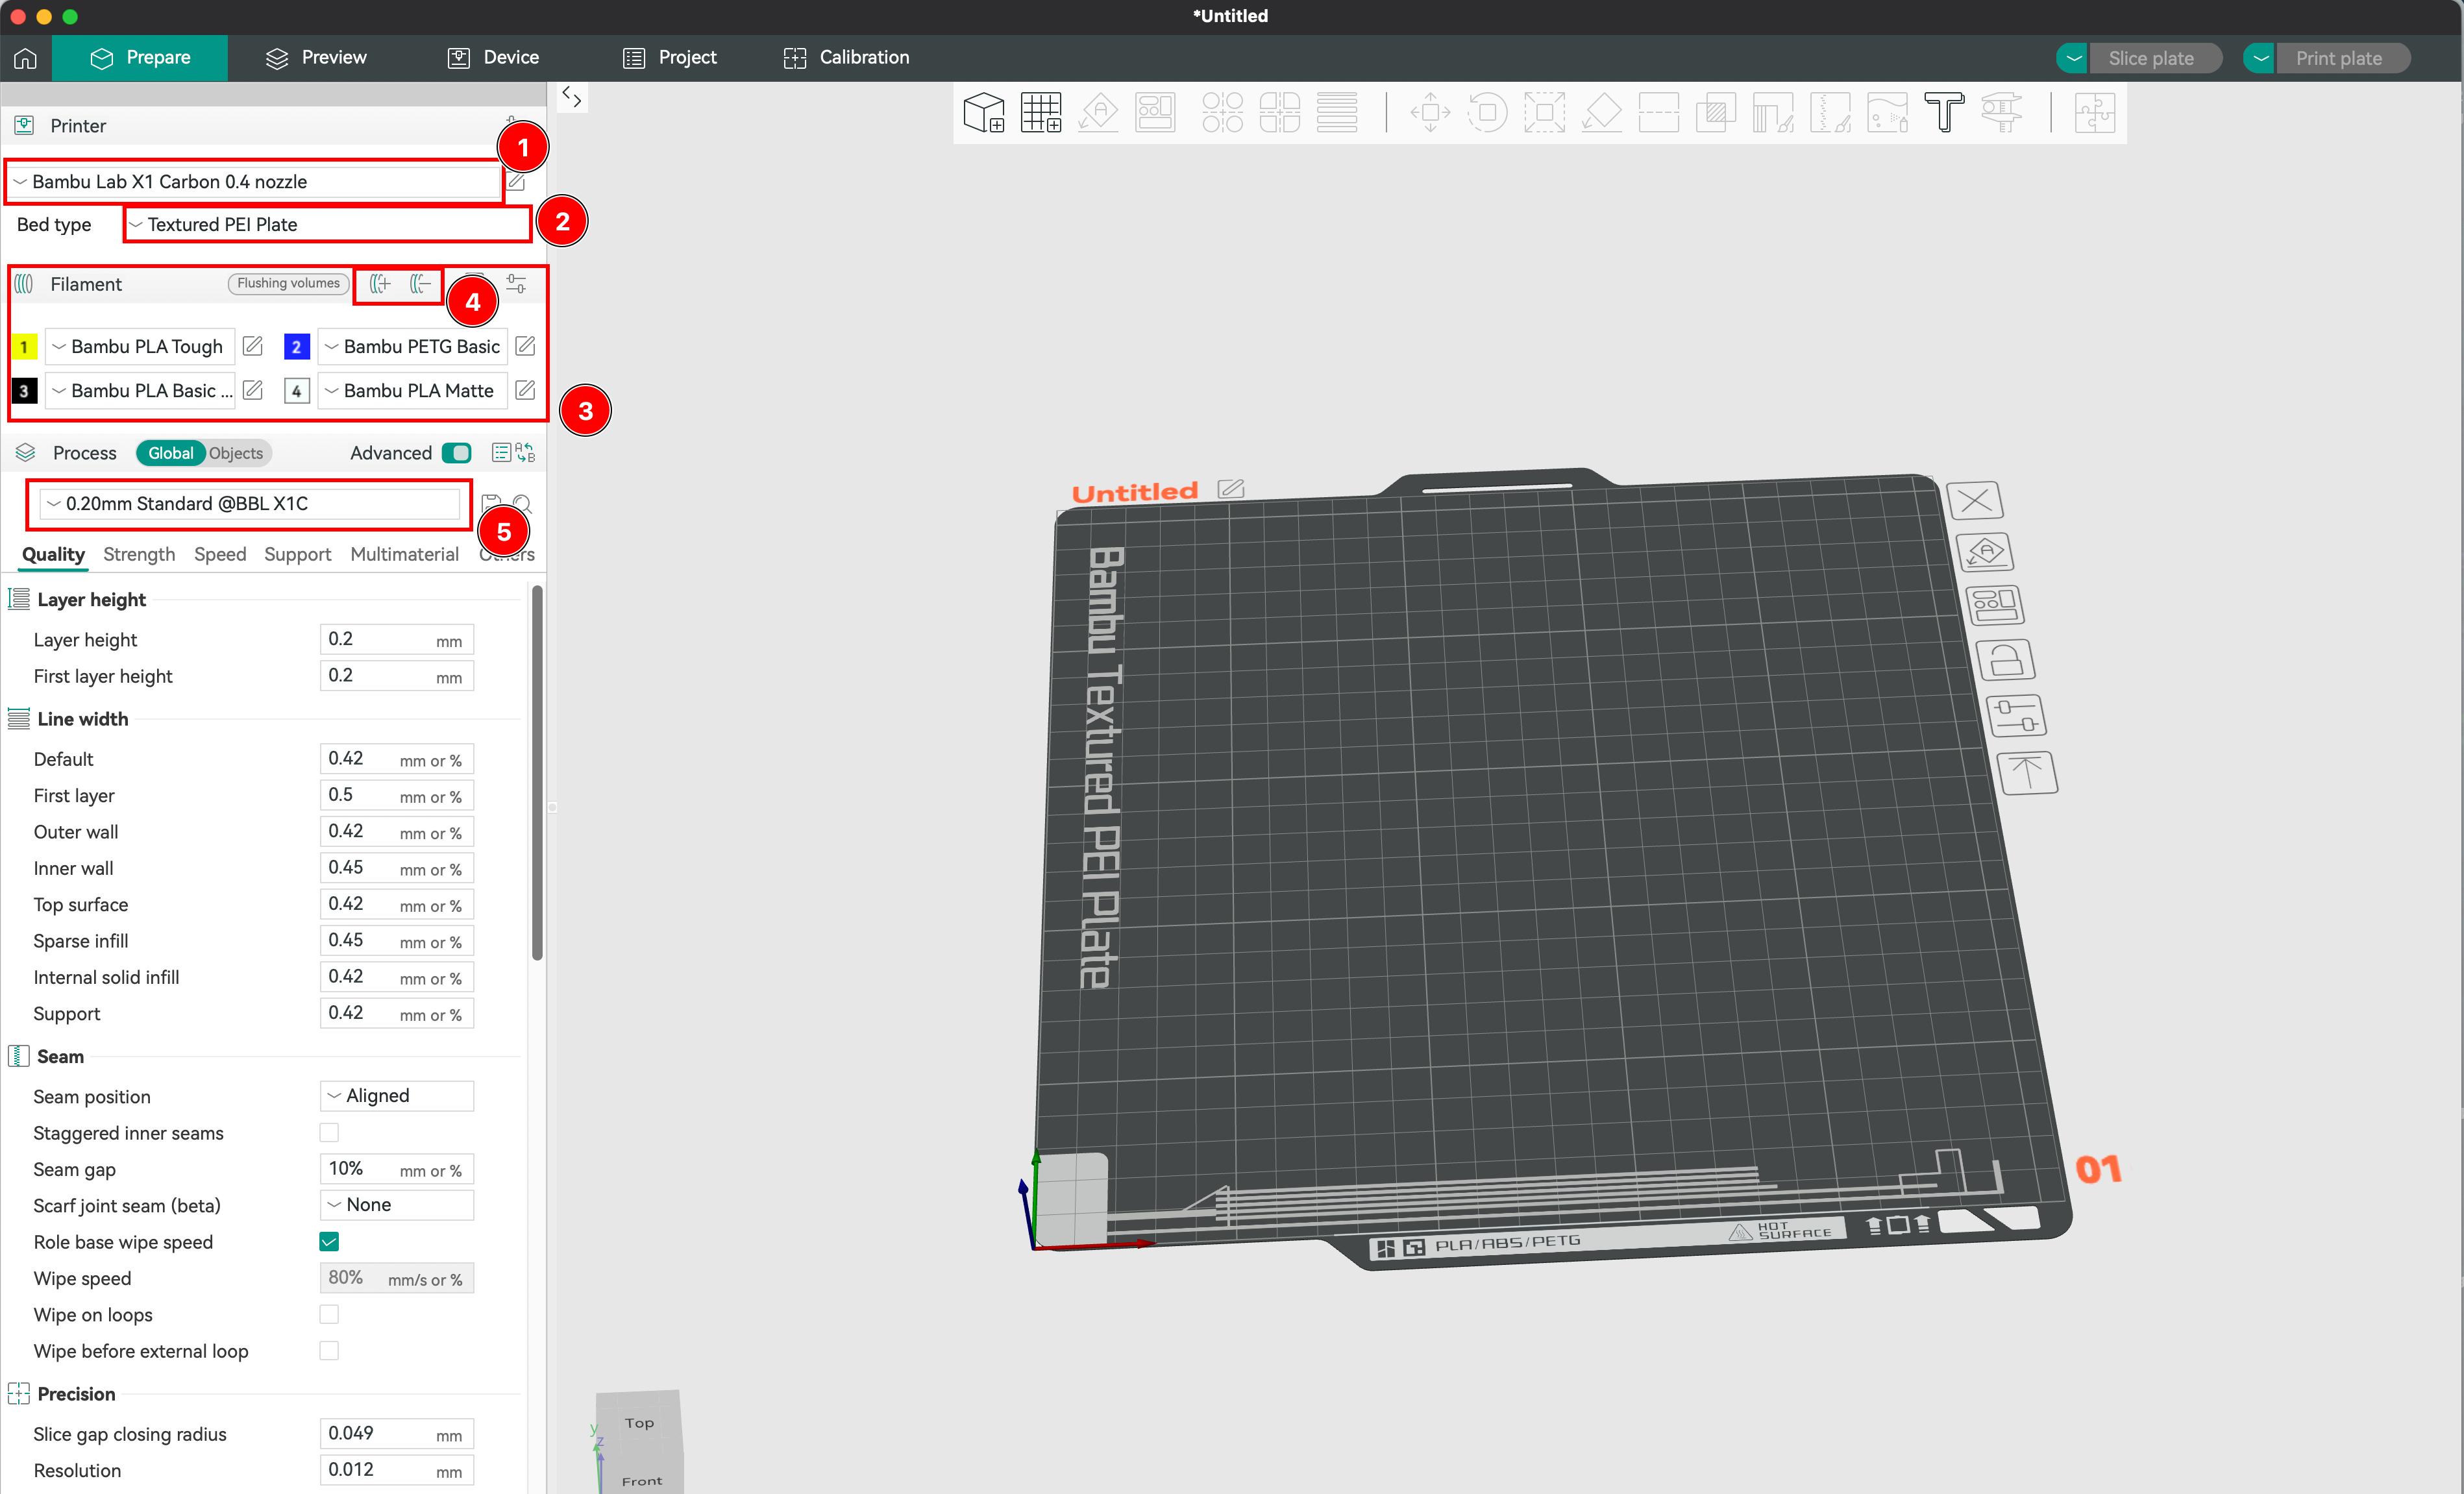
- Configure the printer in the software (model, nozzle diameter, build plate size, material).
- Choose the type of build plate (smooth, textured, technical).
- Select the filament for each file.
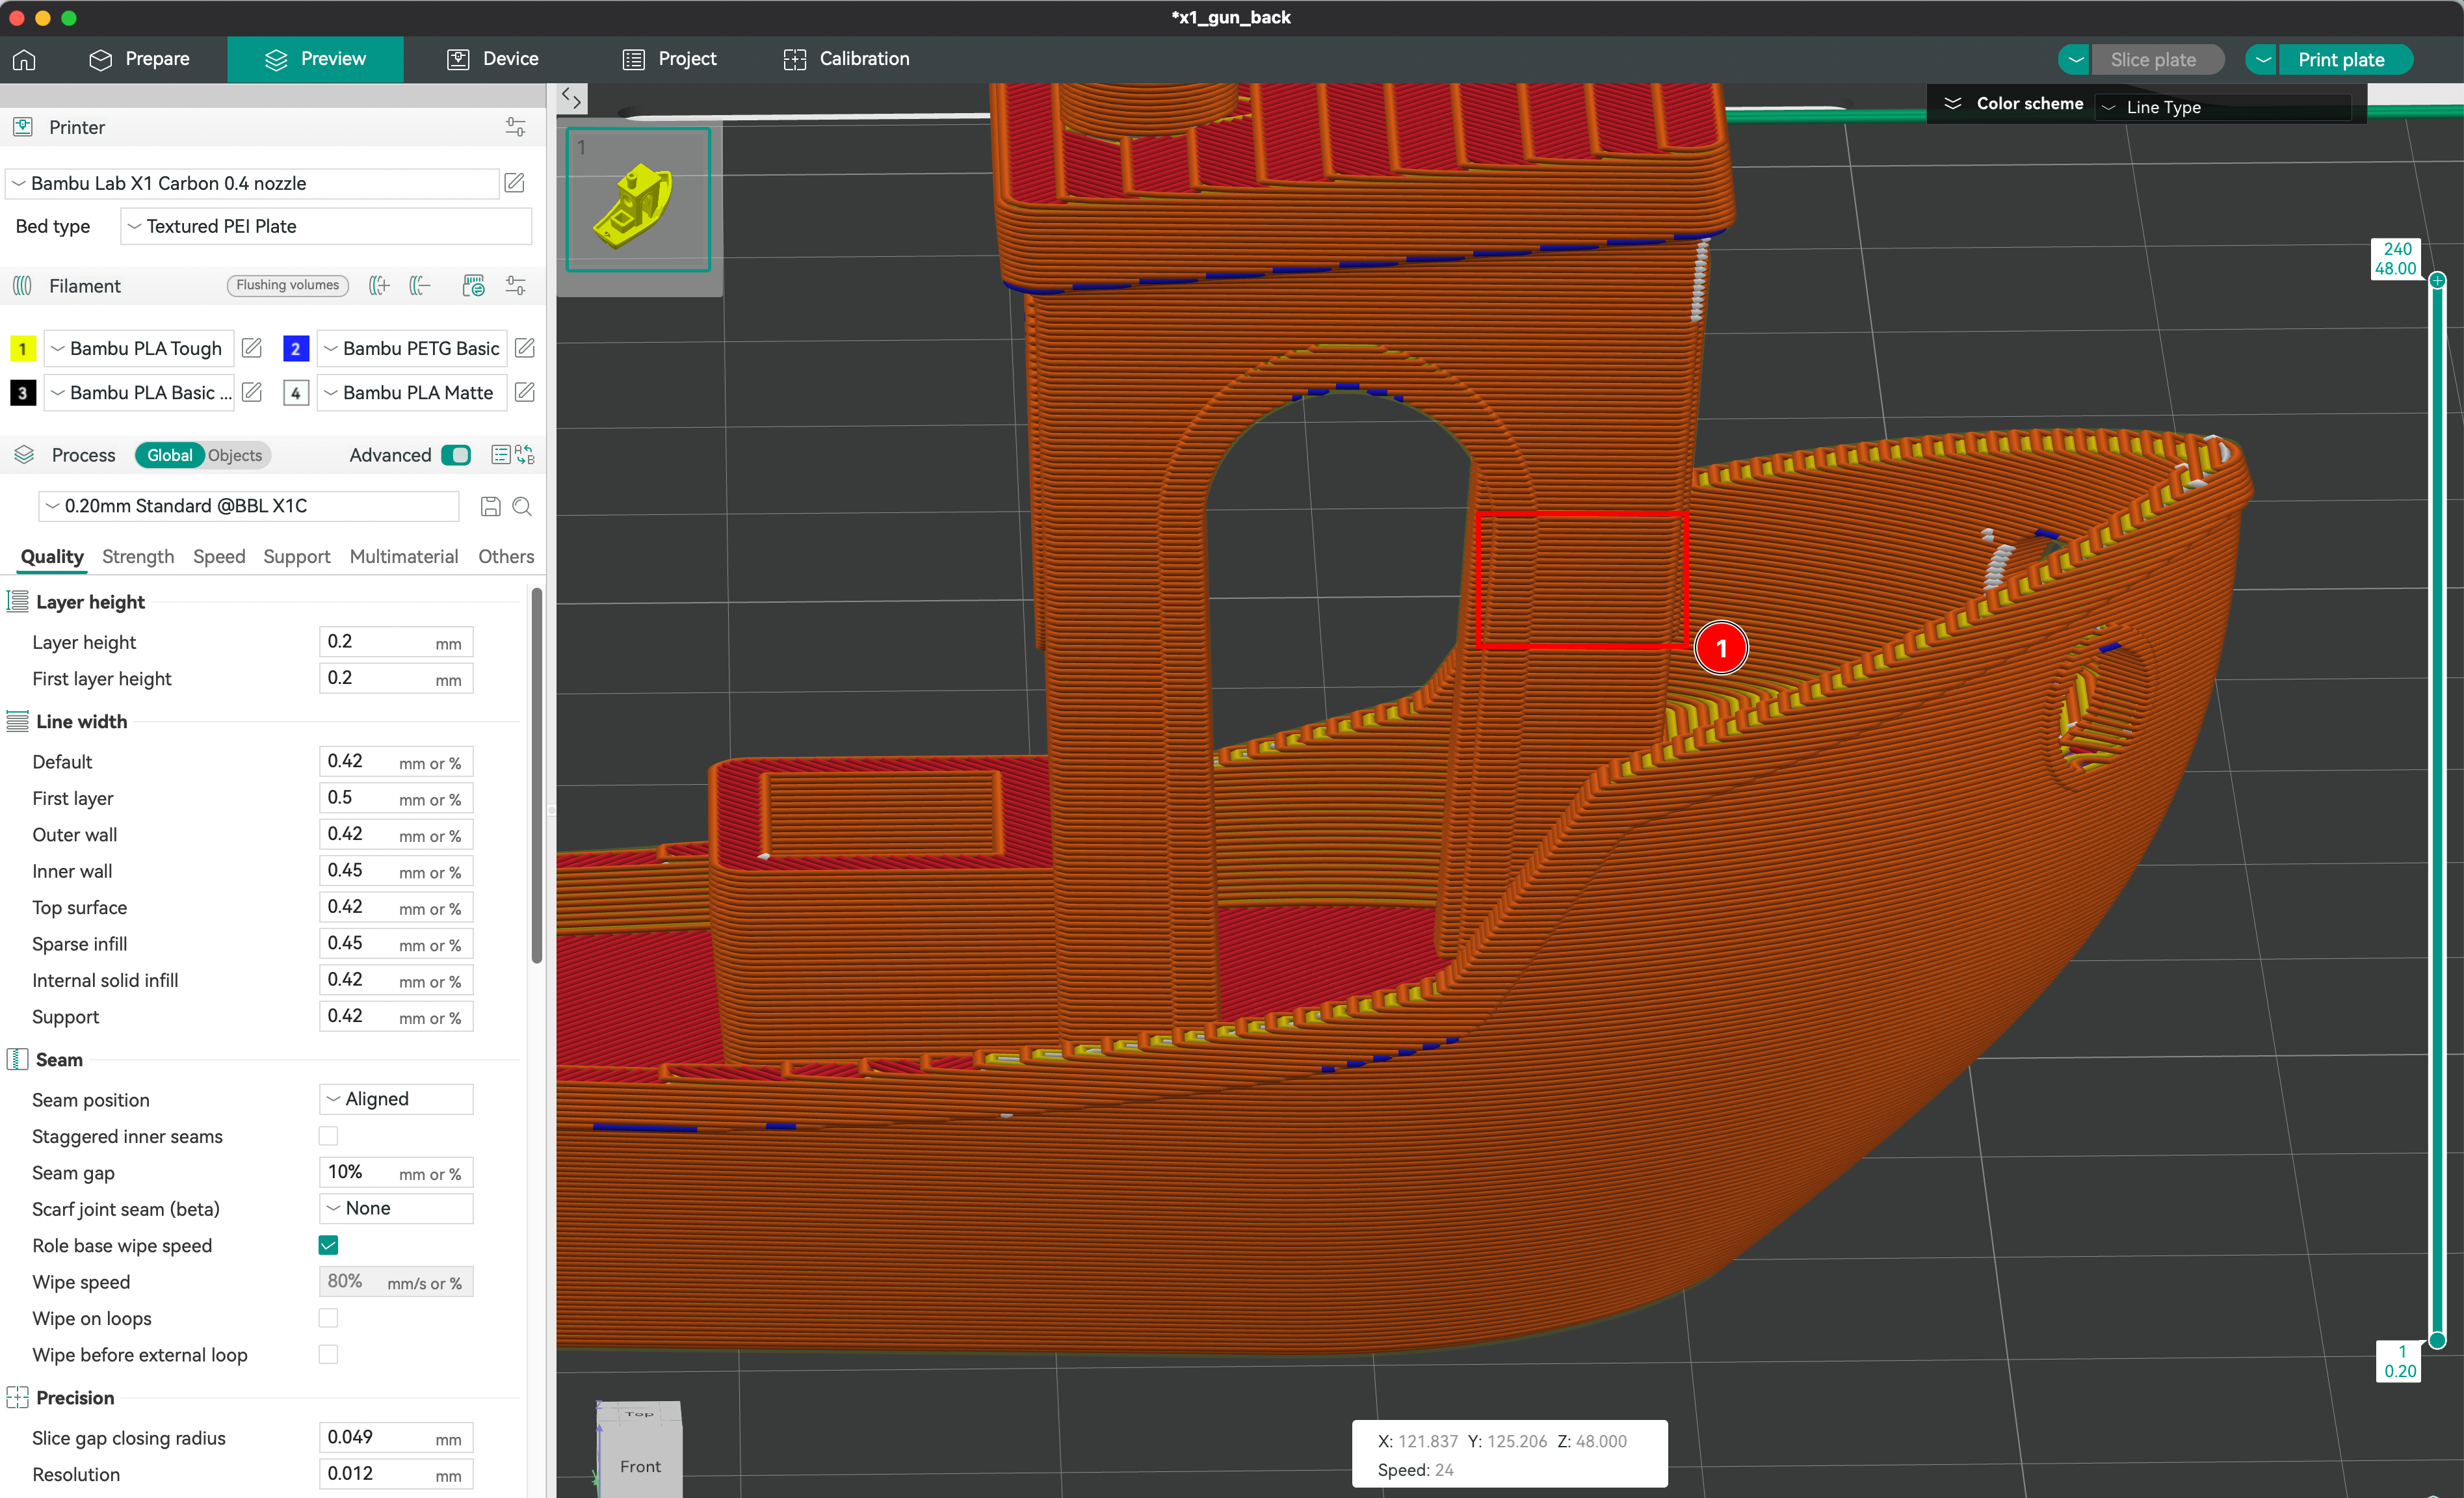
- Set the layer height to adjust the print quality.
Positioning the Object on the Build Plate
Choose the object’s orientation for technical and aesthetic reasons. FDM printing leaves visible layer lines, so choose the orientation wisely.
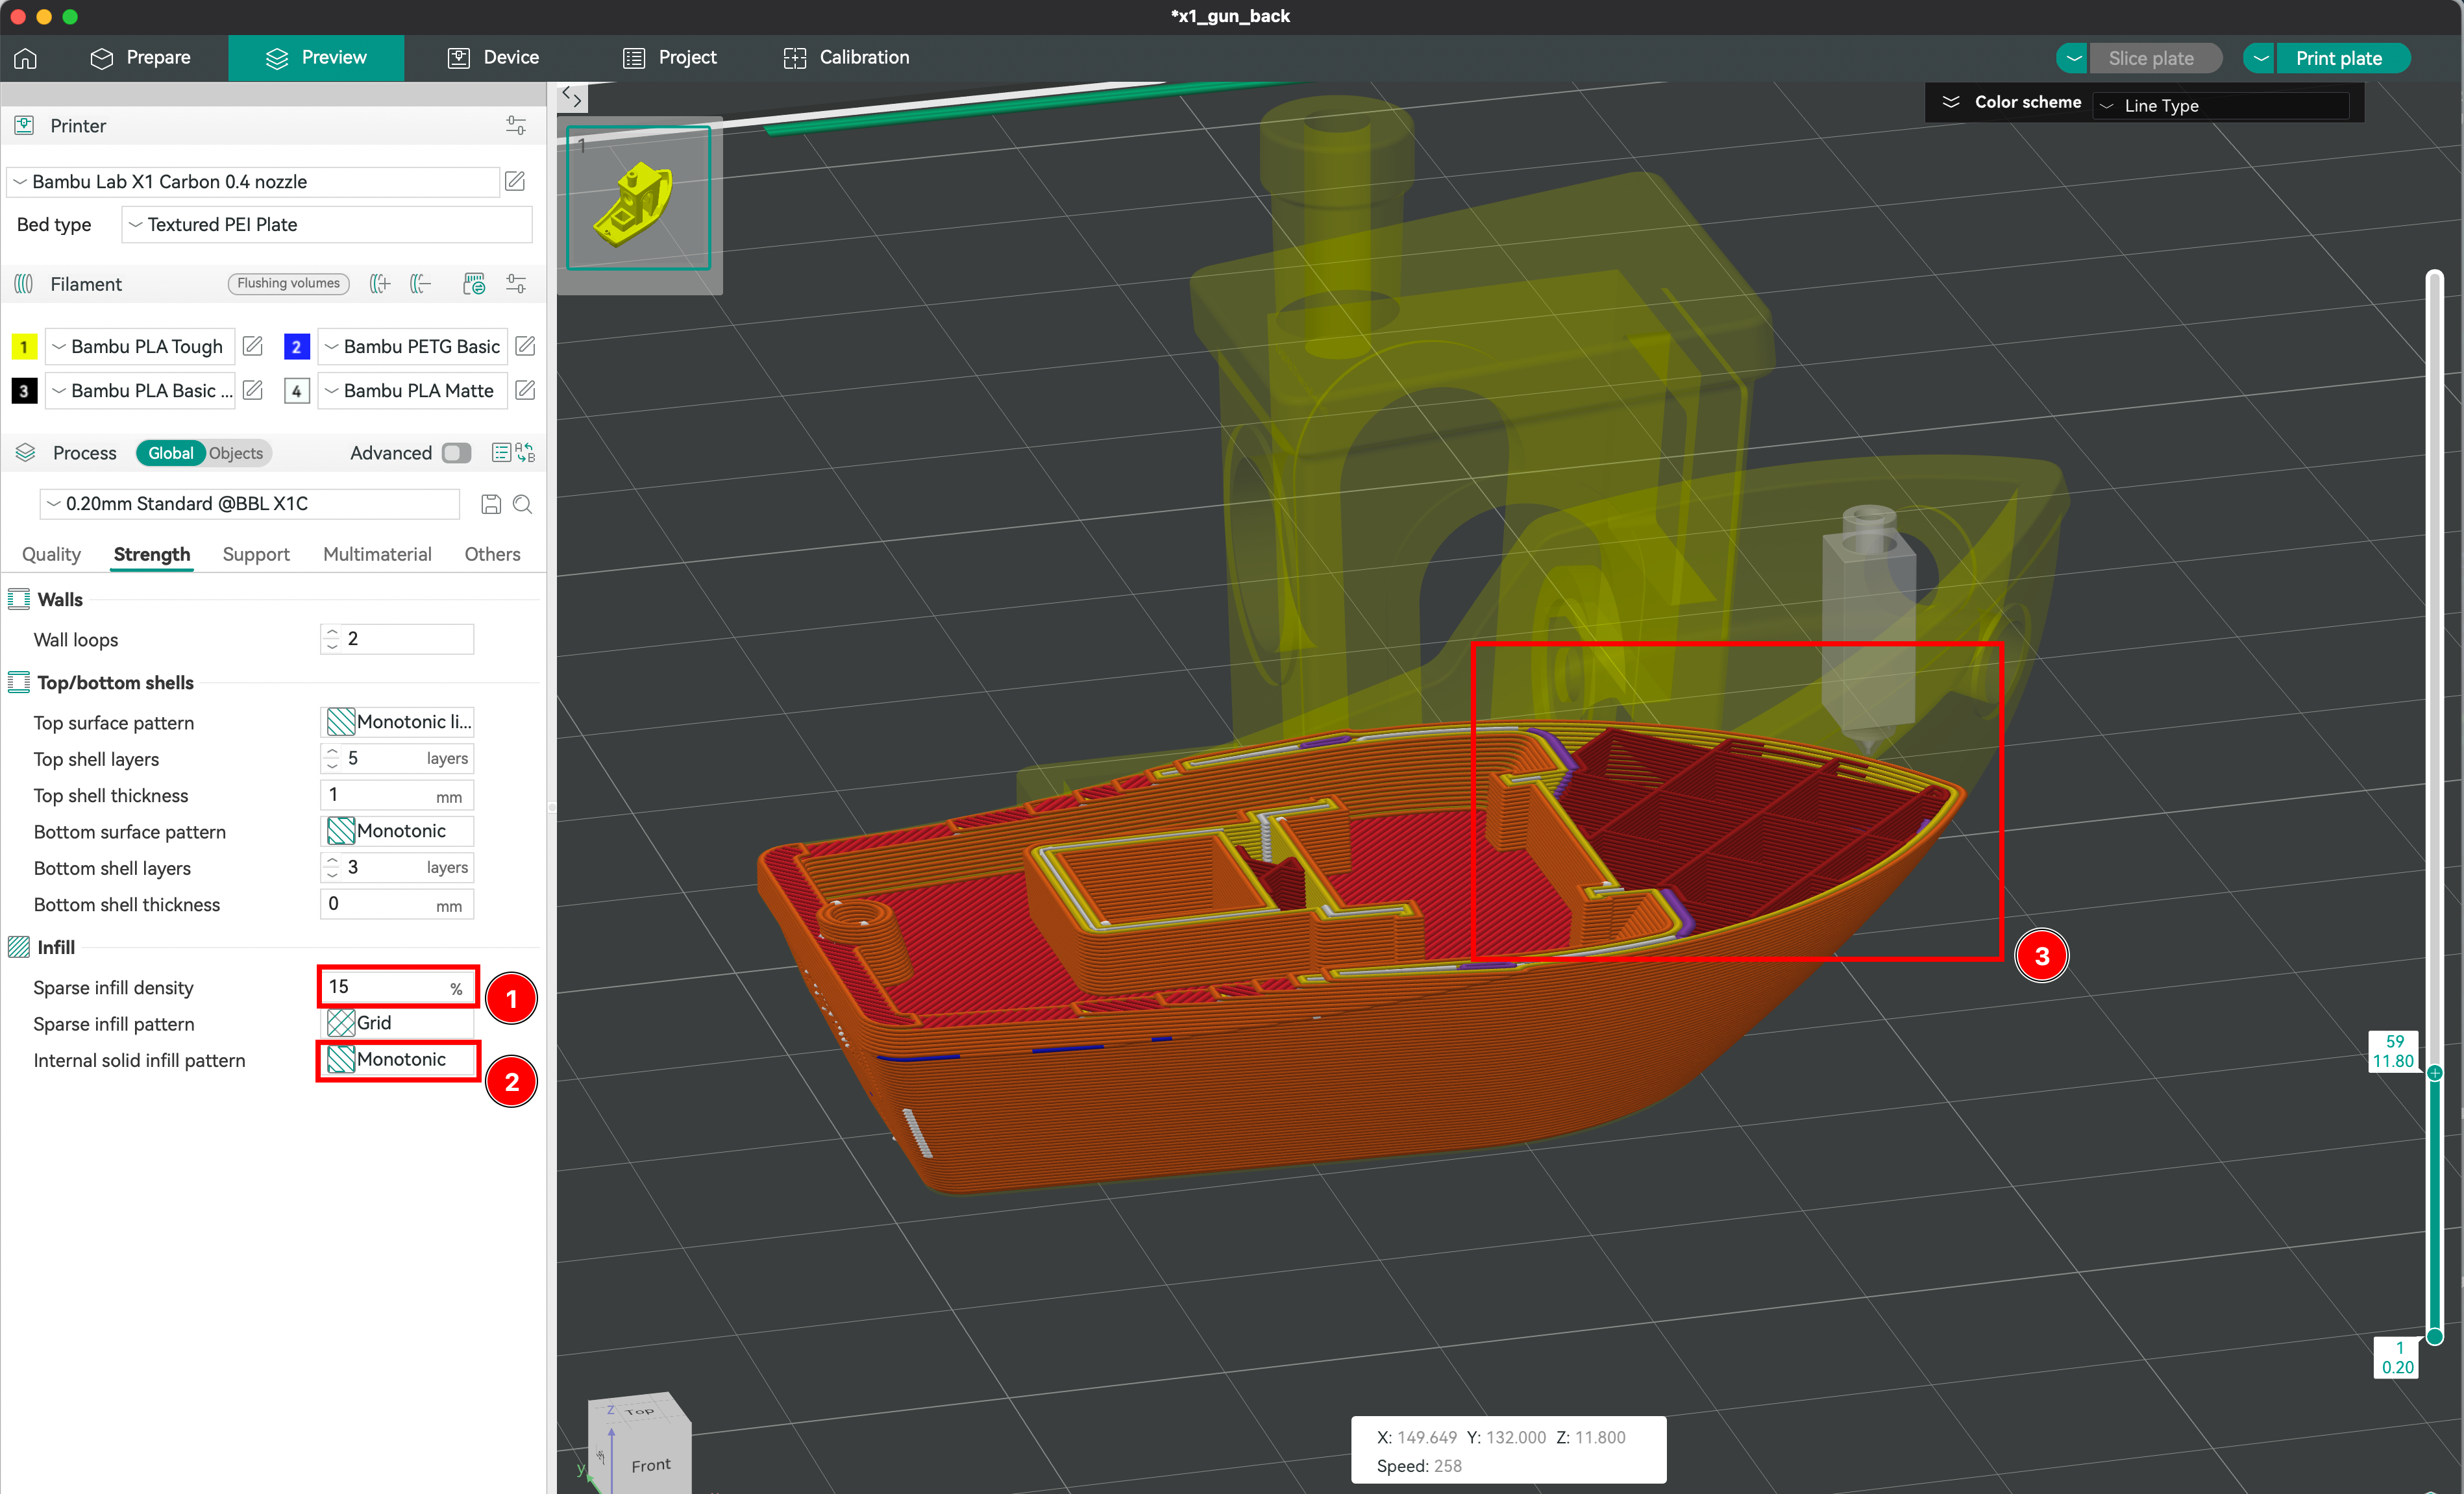
Defining the Infill of the Part
- Adjust the infill density to control the strength and weight of the print.
- Choose from different infill patterns (honeycomb, gyroid, grid).
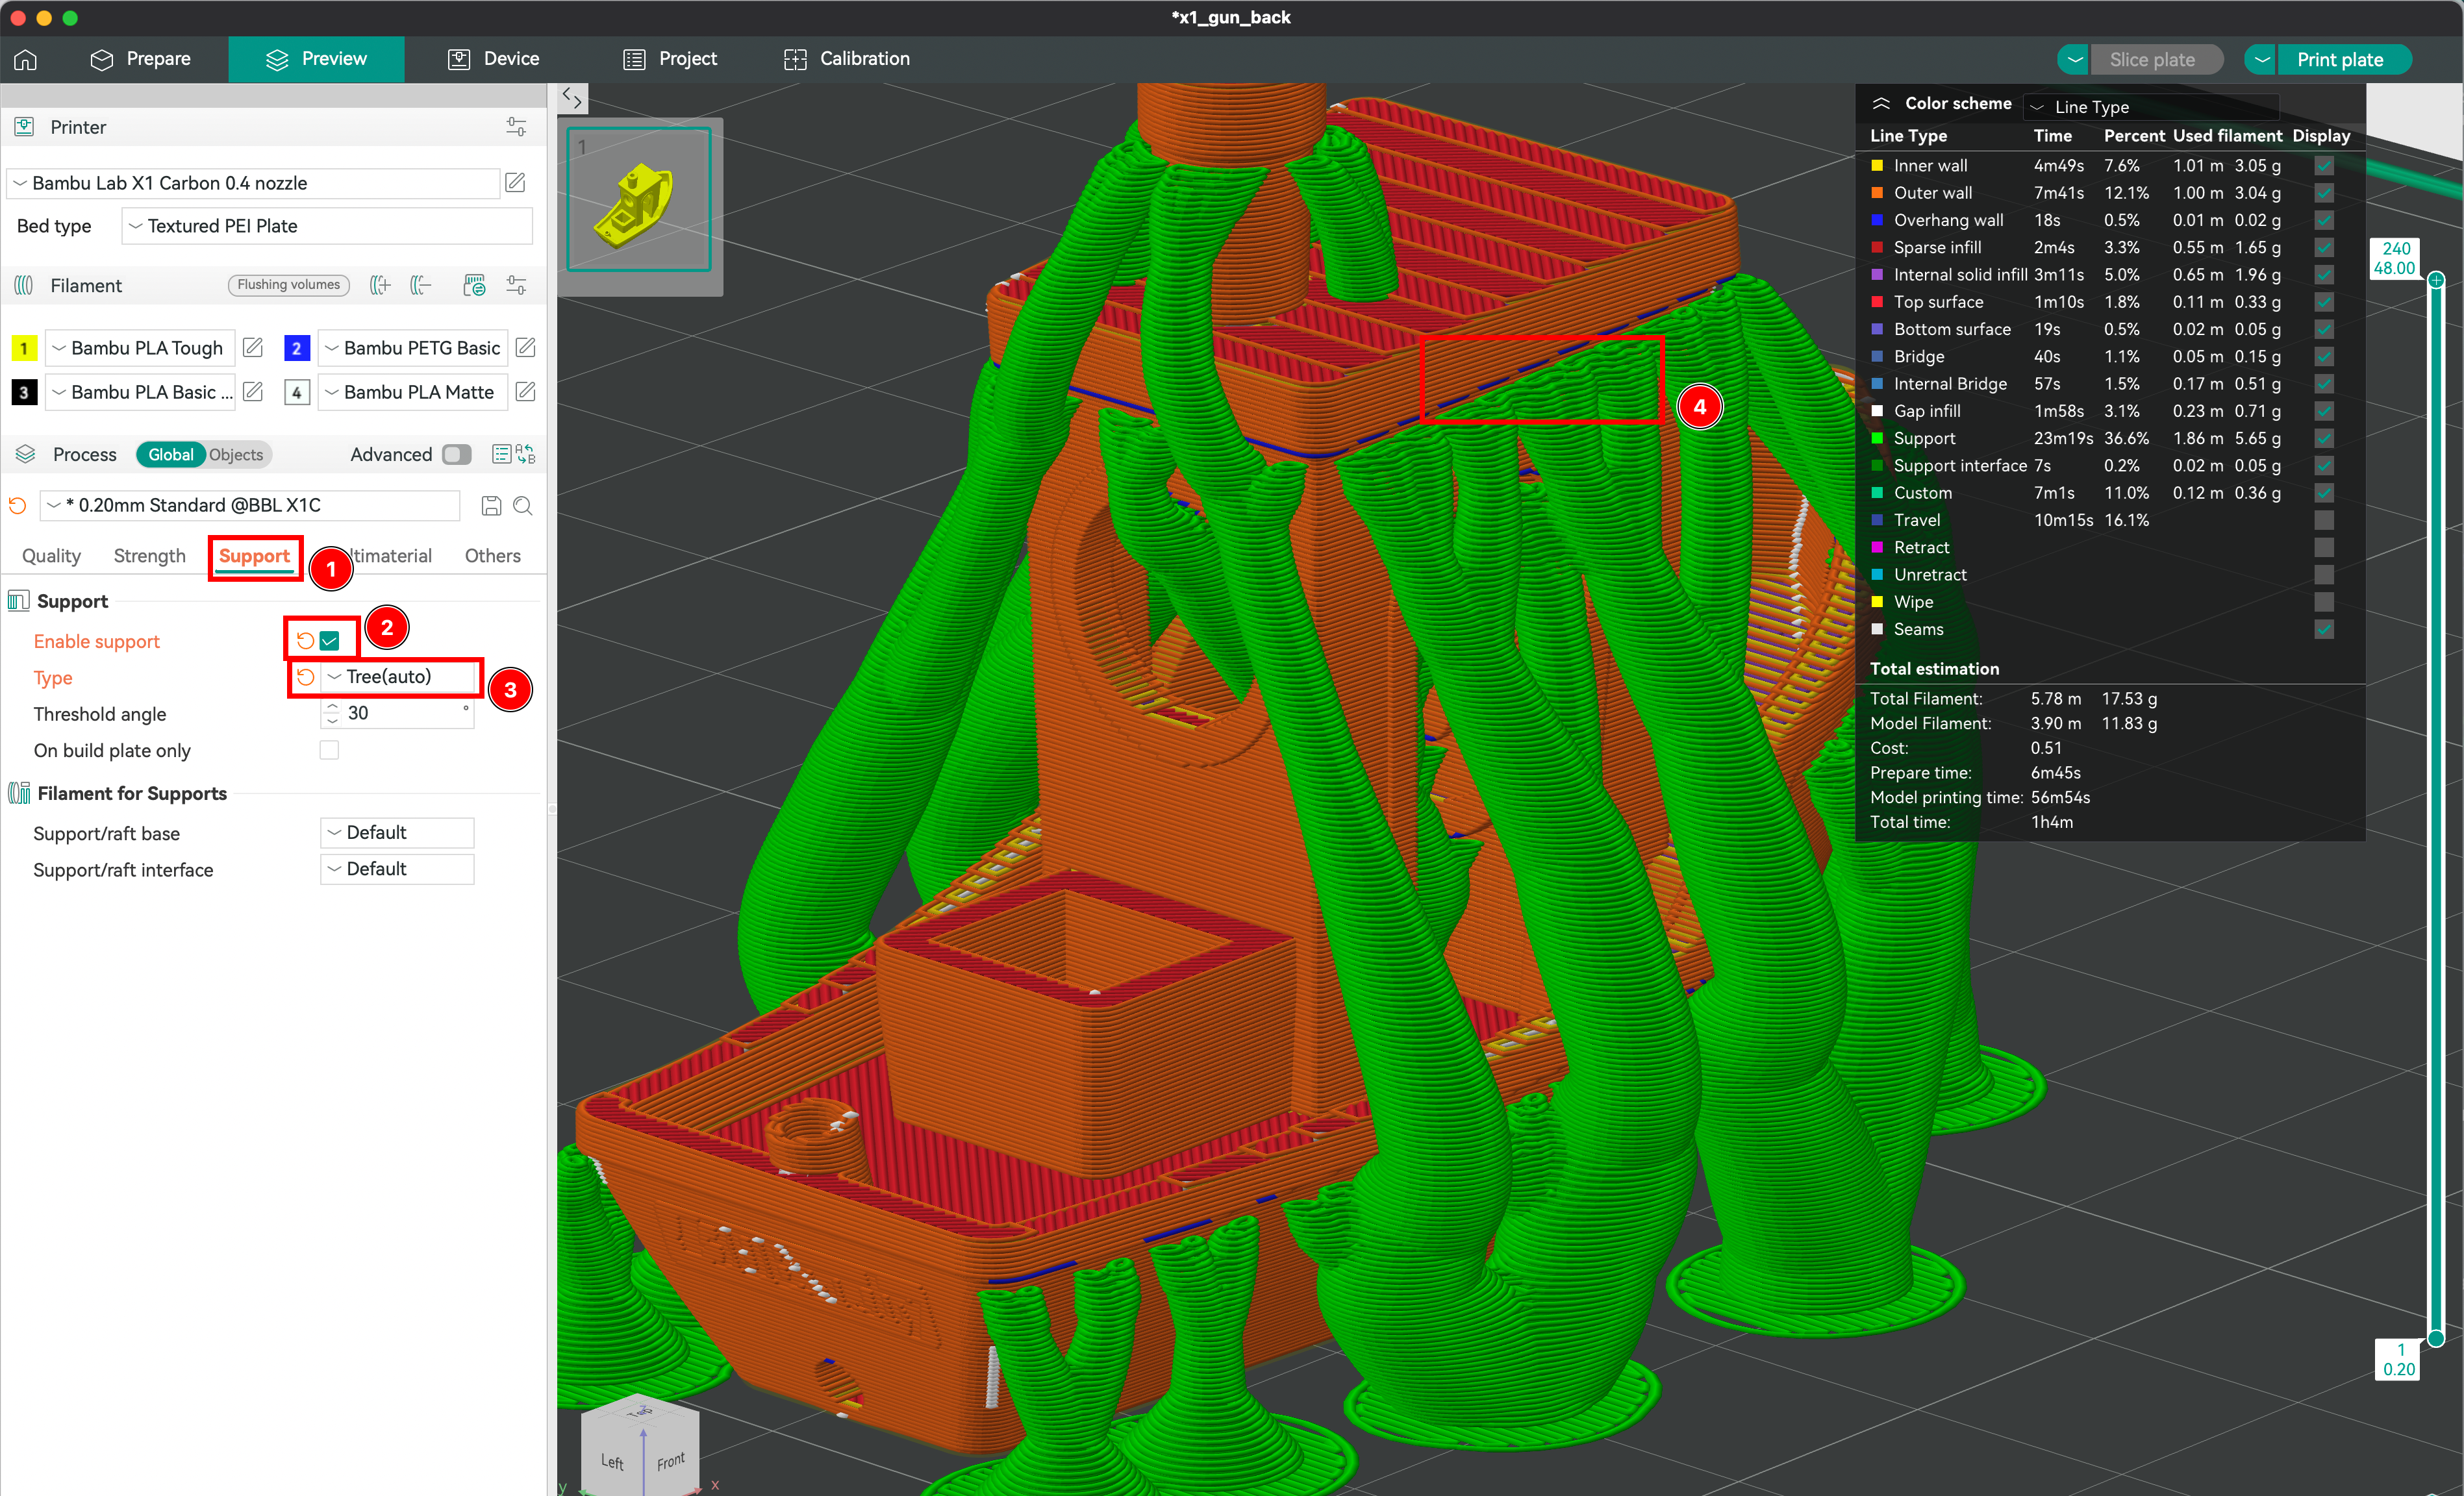
Creating Supports
Supports are necessary for printing overhanging parts. Enable supports and choose between geometric and organic types.
Advanced Settings
OrcaSlicer offers advanced settings to refine your print:
- Print Speed: Control the speed of the extruder.
- Temperature Settings: Set the temperatures of the nozzle and the build plate.
- Fan Speed: Adjust the cooling speed of the filament.
- Retraction Settings: Manage filament retraction to prevent stringing.
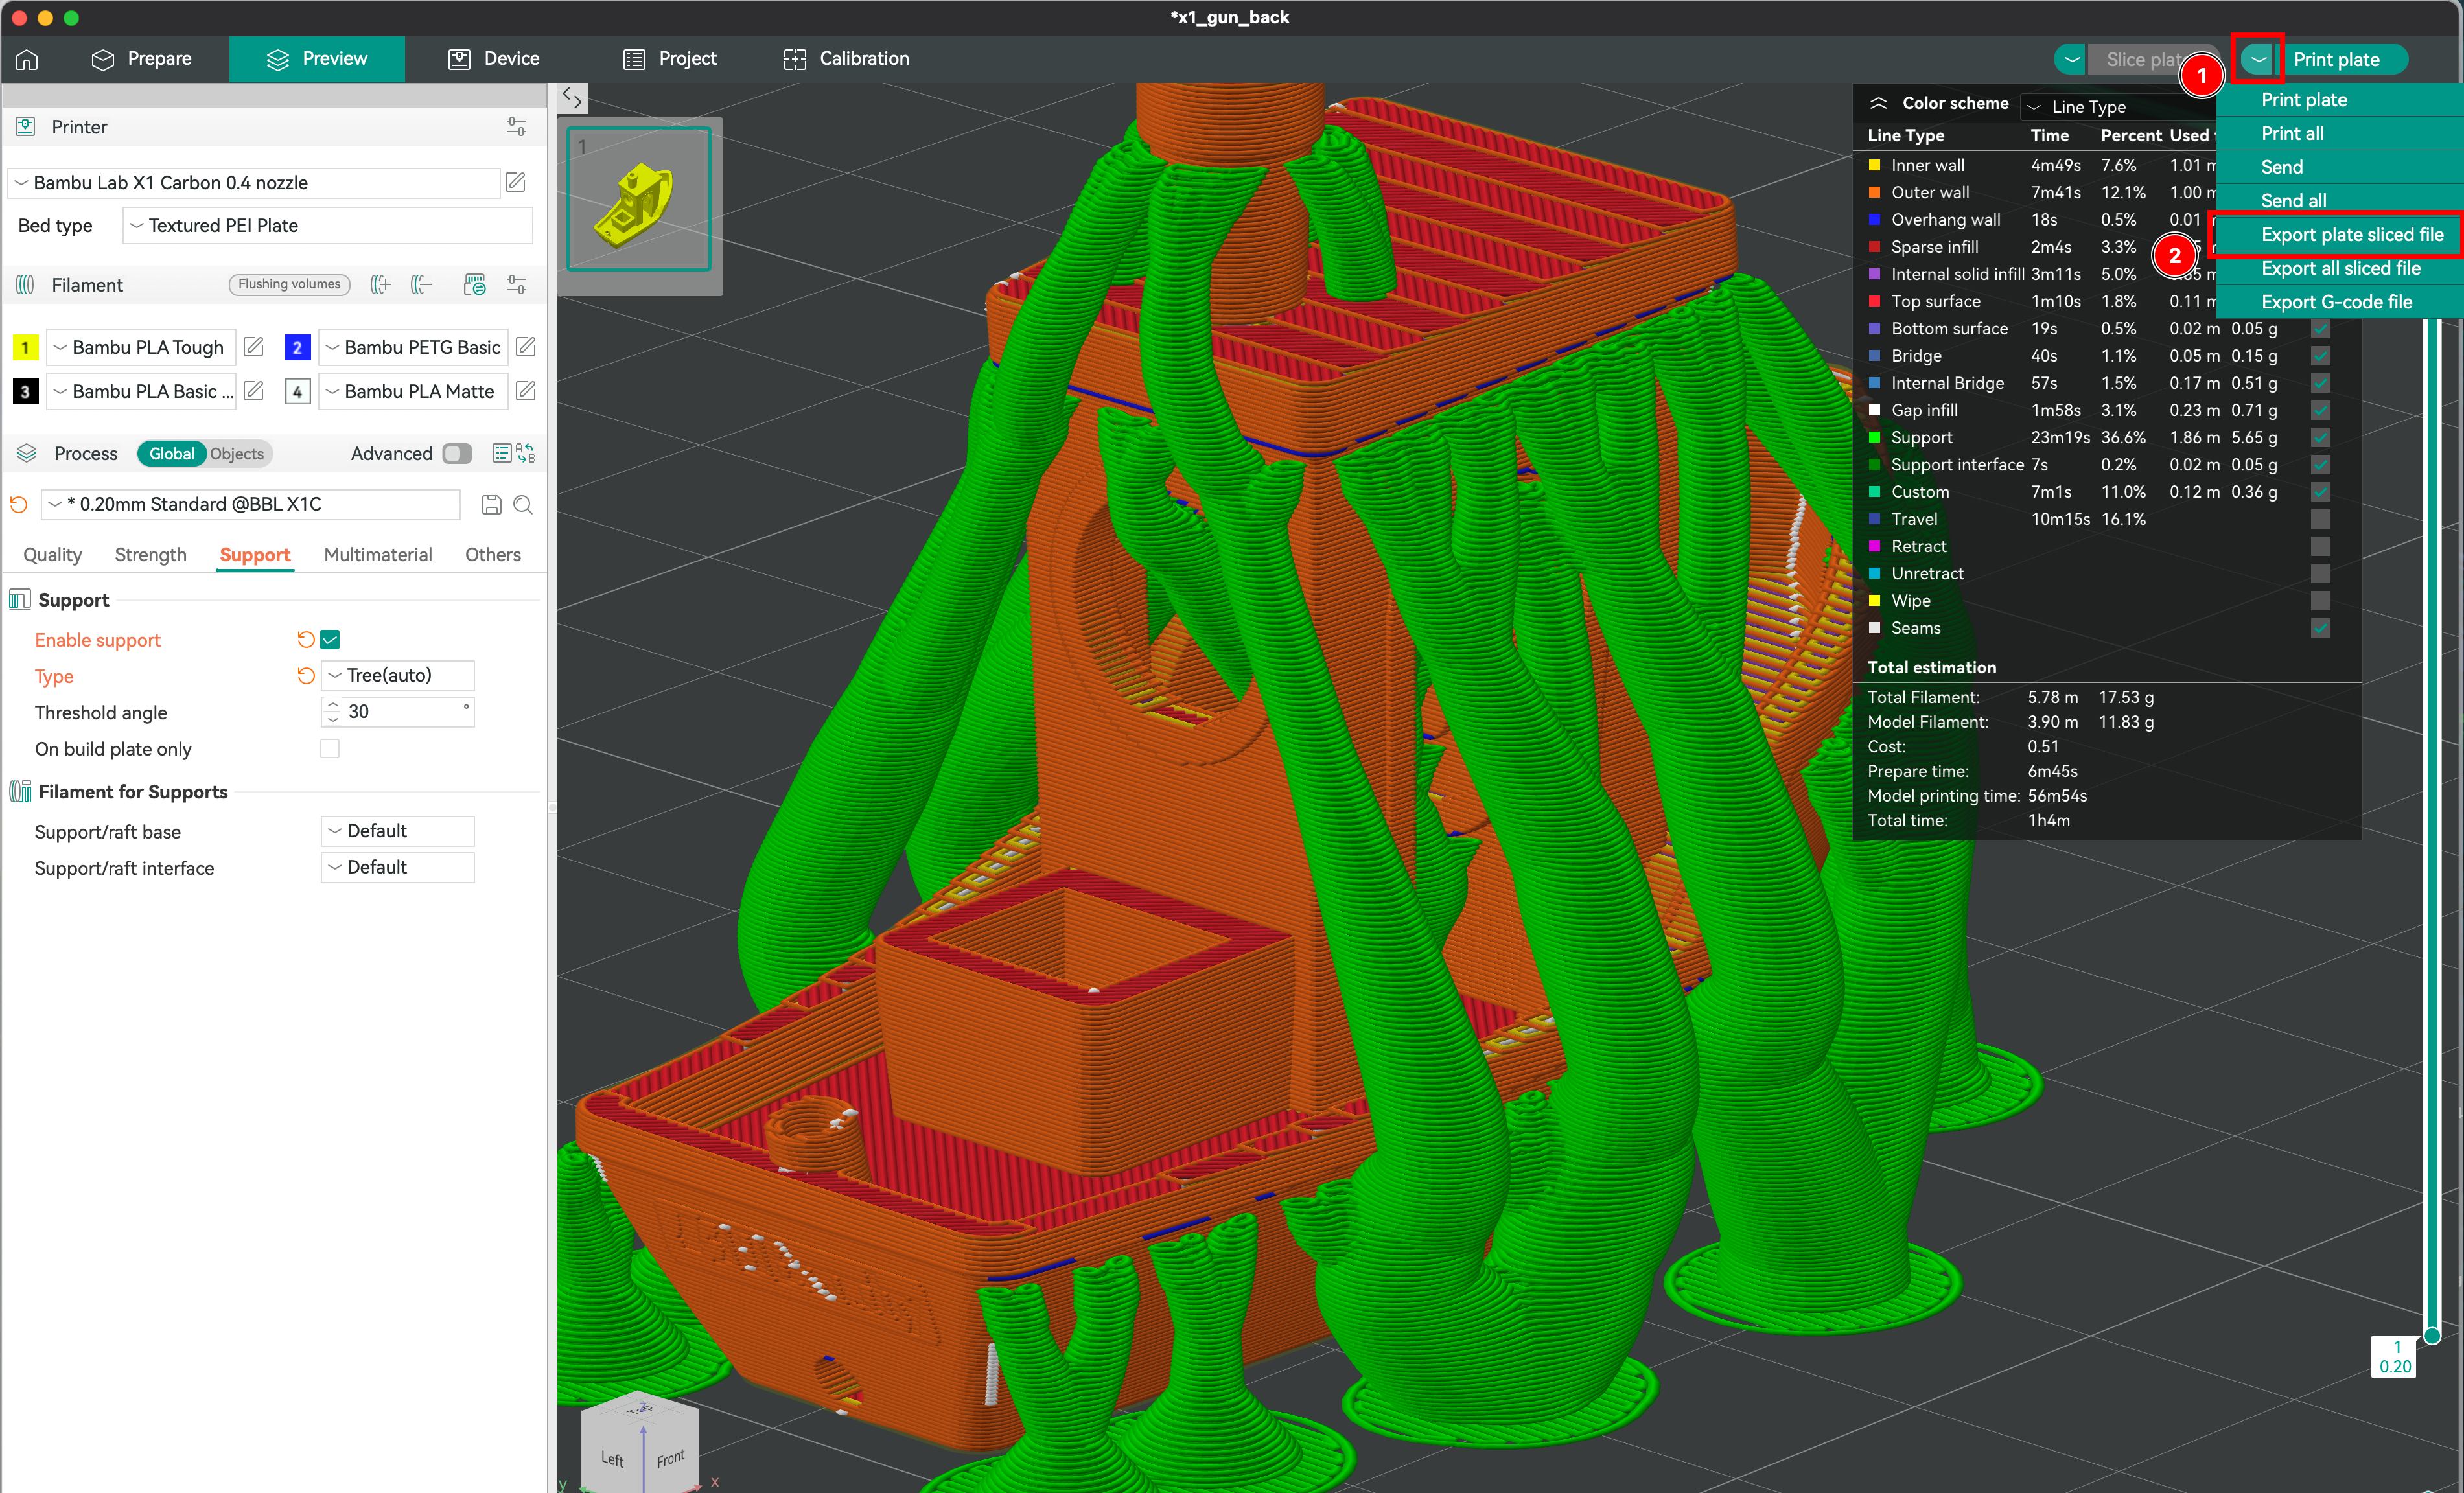
Saving and Exporting Sliced Files
- Save the sliced file.
- Export it to the printer by inserting the SD card.
Preparing the Printer
- Verify that the filament is correctly loaded.
- Ensure there is enough filament for the print.
- Clean and level the build plate.
- Start the print.
Introduction to Embedded AI
What is Embedded AI?
Embedded AI refers to computer systems integrated into everyday objects, such as smartwatches or autonomous robots. These systems are optimized to perform specific tasks with limited resources.
Why is Embedded AI Crucial Today?
- Energy Efficiency: Operates with low power consumption.
- Independence and Autonomy: Functions 100% offline.
- Real-Time: Provides ultra-fast responses for critical applications.
Difference Between a Microcontroller and a Microcomputer
| Characteristic | Microcontroller ⚙️ | Microcomputer 💻 |
|---|---|---|
| Definition | An integrated circuit with a processor, memory, and peripherals on a single chip. | A small computer with a processor, memory, operating system, and expansion ports. |
| Operating System | None (runs a single program in a loop) | Yes (e.g., Linux on Raspberry Pi) |
| Computing Power | Low, optimized for simple and repetitive tasks | More powerful, capable of running complex applications |
| Memory (RAM & Storage) | Very limited (a few KB to MB) | More substantial (512 MB to several GB) |
| Power Consumption | Very low (runs on batteries for a long time) | Higher (often requires a power supply) |
| Programming | Code often written in C or assembly, with precise execution timing | Can run various languages (Python, Java, C++) and multiple processes in parallel |
| Use Cases | Motor control, sensor management, basic robotics | Computer vision, embedded AI, lightweight servers, connected weather stations |
Future Perspectives
With the evolution of microcontrollers, we are seeing increasingly intelligent applications:
- Autonomous vehicles
- Real-time medical monitoring
- AI-assisted surveillance
Types of Devices for Embedded AI
Most Known Platforms
| Type of Board | Characteristics | Examples |
|---|---|---|
| CPU Only | Low power consumption, suitable for light tasks | Raspberry Pi, Arduino |
| CPU + GPU/TPU | Accelerated computing for AI and vision tasks | NVIDIA Jetson, Coral Edge TPU |
| FPGA | Highly specialized, low power consumption | Xilinx, Lattice |
Comparison Between Raspberry Pi and Jetson
| Criteria | Raspberry Pi 5 | NVIDIA Jetson Nano |
|---|---|---|
| CPU | Quad-core 64-bit | Quad-core ARM Cortex-A57 |
| GPU | None | 128 CUDA cores |
| Memory | 8GB LPDDR4X | 4GB LPDDR4 |
| Ideal Use | IoT, automation, home automation | Computer vision, AI |
Conclusion: The Raspberry Pi is ideal for simple and efficient solutions, while the Jetson Nano is better suited for advanced AI needs.
Focus on the Raspberry Pi
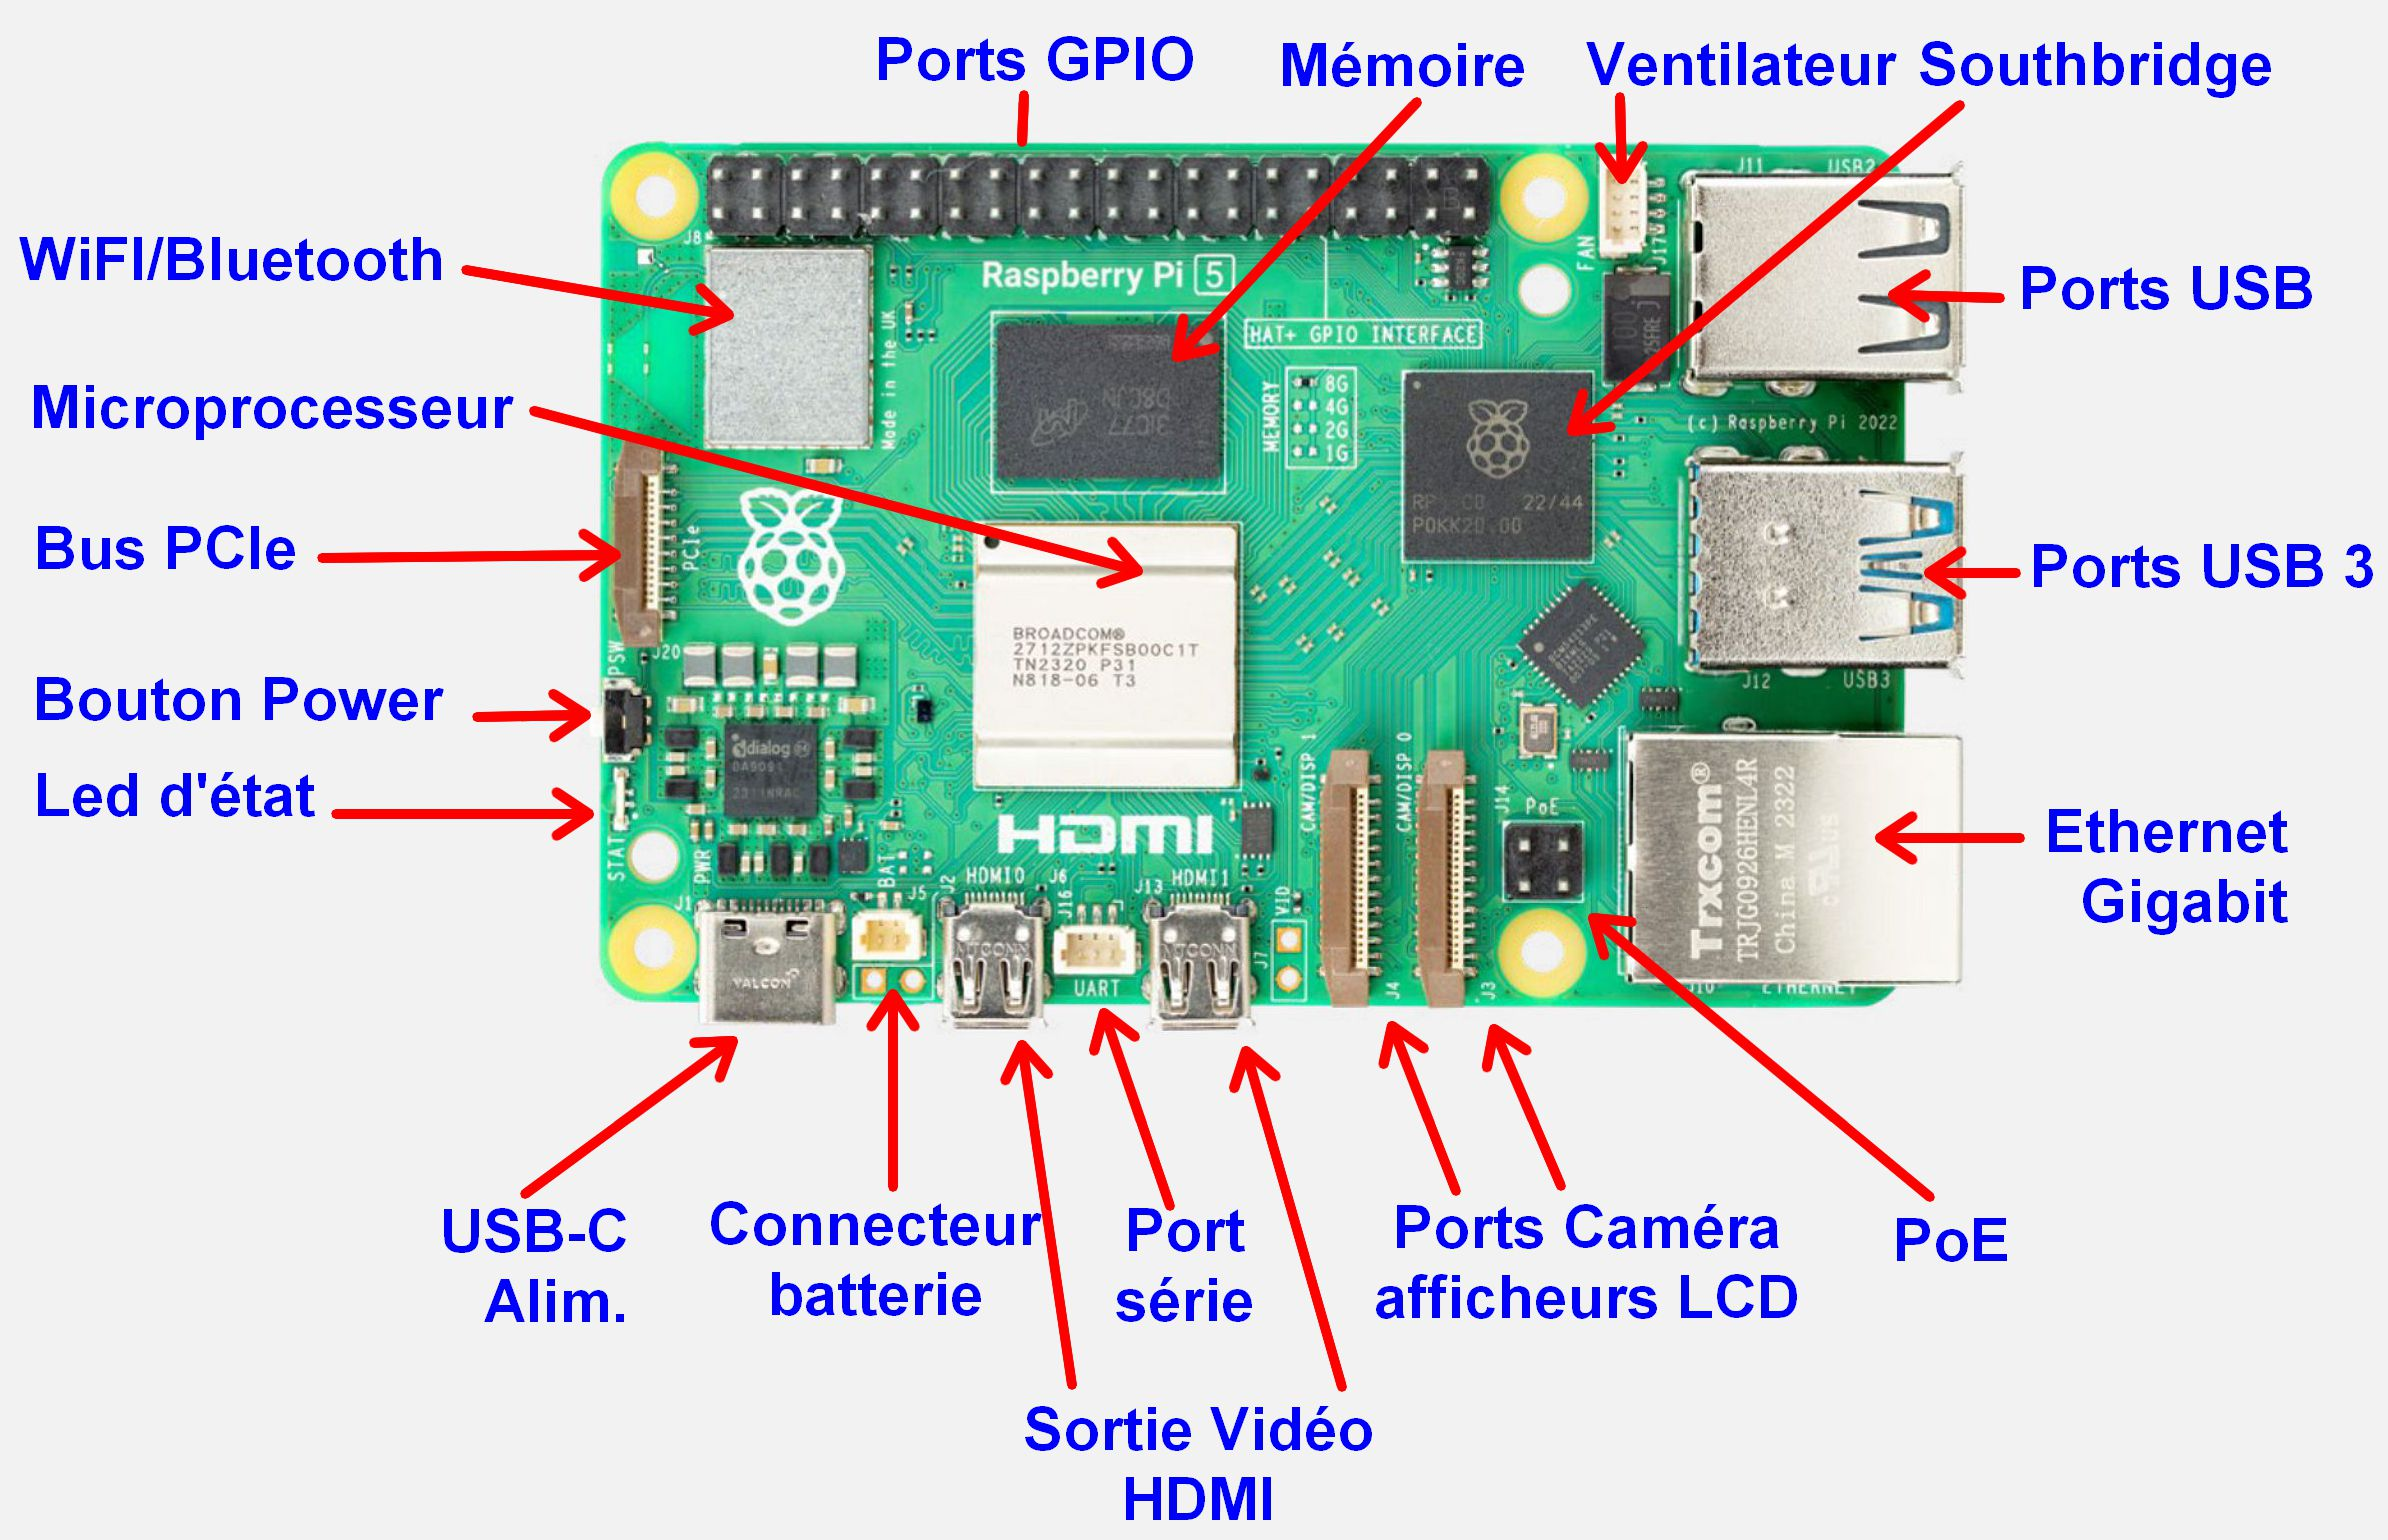
The Raspberry Pi is a single-board microcomputer based on ARM architecture, developed by the Raspberry Pi Foundation. Designed for education, it has become a reference in the DIY, embedded, and AI fields.
- Operating System: Raspberry Pi OS, based on Debian.
- Programming Languages: Python, C, Java, and more.
- Applications: Home automation, robotics, web servers, weather stations, embedded AI.
Installing a Raspberry Pi is simple:
- A microSD card.
- RPI Imager to flash the microSD card with an image of your choice.
Computer Vision

Computer Vision is a field of AI that enables machines to understand and analyze images or videos.
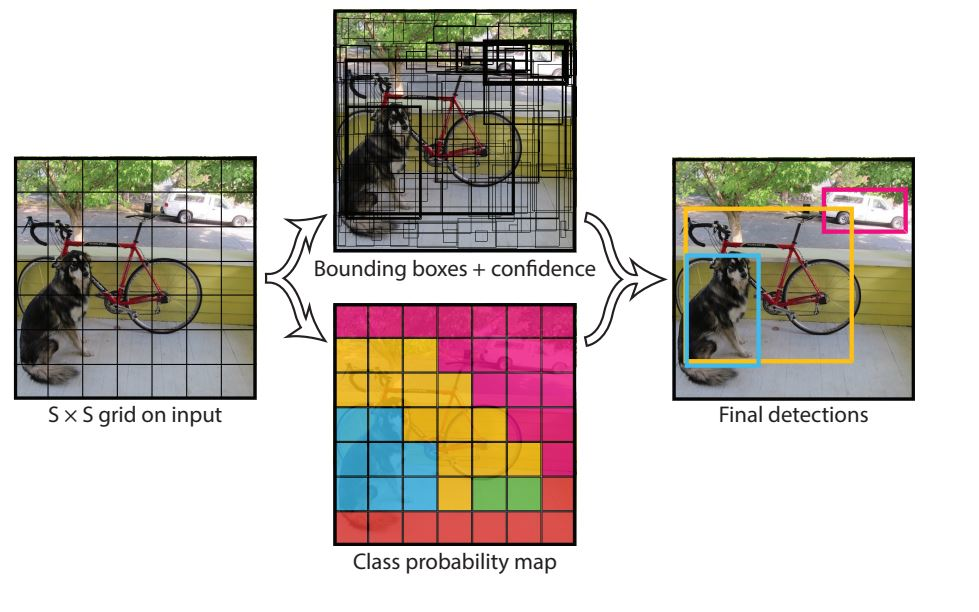
You Only Look Once (YOLO)

YOLO is an algorithm for real-time object detection that processes the image in a single pass, making the process extremely fast and efficient.
Embedded AI and Real-Time Computer Vision
Why Embed AI on Small Devices?
- Privacy: No need to send sensitive data to the cloud.
- Autonomy: Functions without an internet connection.
- Cost Reduction: Less dependence on server infrastructure.
The Challenge of Real-Time Computer Vision
Detecting an object in milliseconds with limited resources is a real challenge. Here are the obstacles to overcome:
- Limited computing power.
- Critical processing time.
- Handling continuous video streams.
- Minimal latency for instant response.
Multiprocessing & embedded AI
Introduction
Welcome to this part of the workshop where we will talk about optimization and real-time processing. In our case, we need to process a continuous video stream, perform fast inference, and send an alert as quickly as possible.
To achieve this, we will use multiprocessing to parallelize tasks and avoid bottlenecks!
Hardware & Preparation
We will use:
- Raspberry Pi 5 (8 GB RAM)
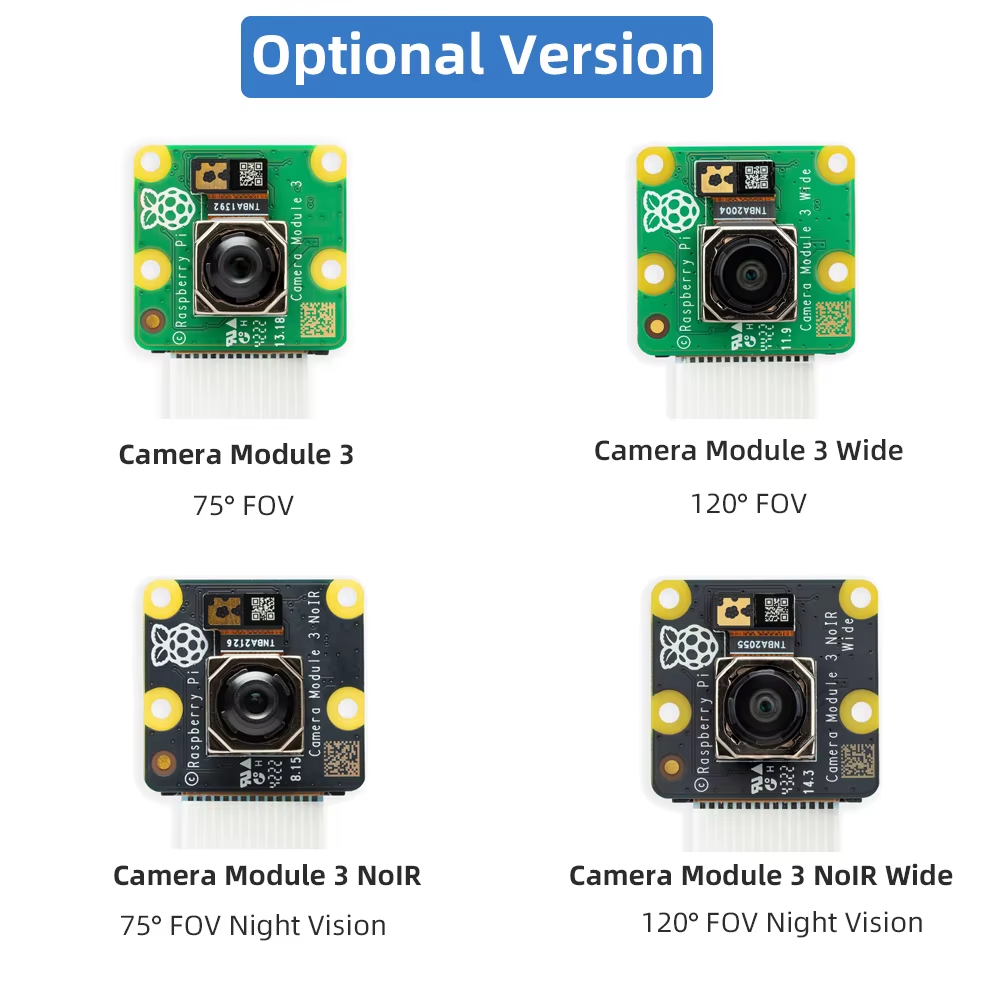
- PiCamera Module 3: MAX 30 FPS / 12Mpx
- Battery or power adapter
Now that we know the Raspberry Pi, we can explore its ecosystem, including its range of cameras:
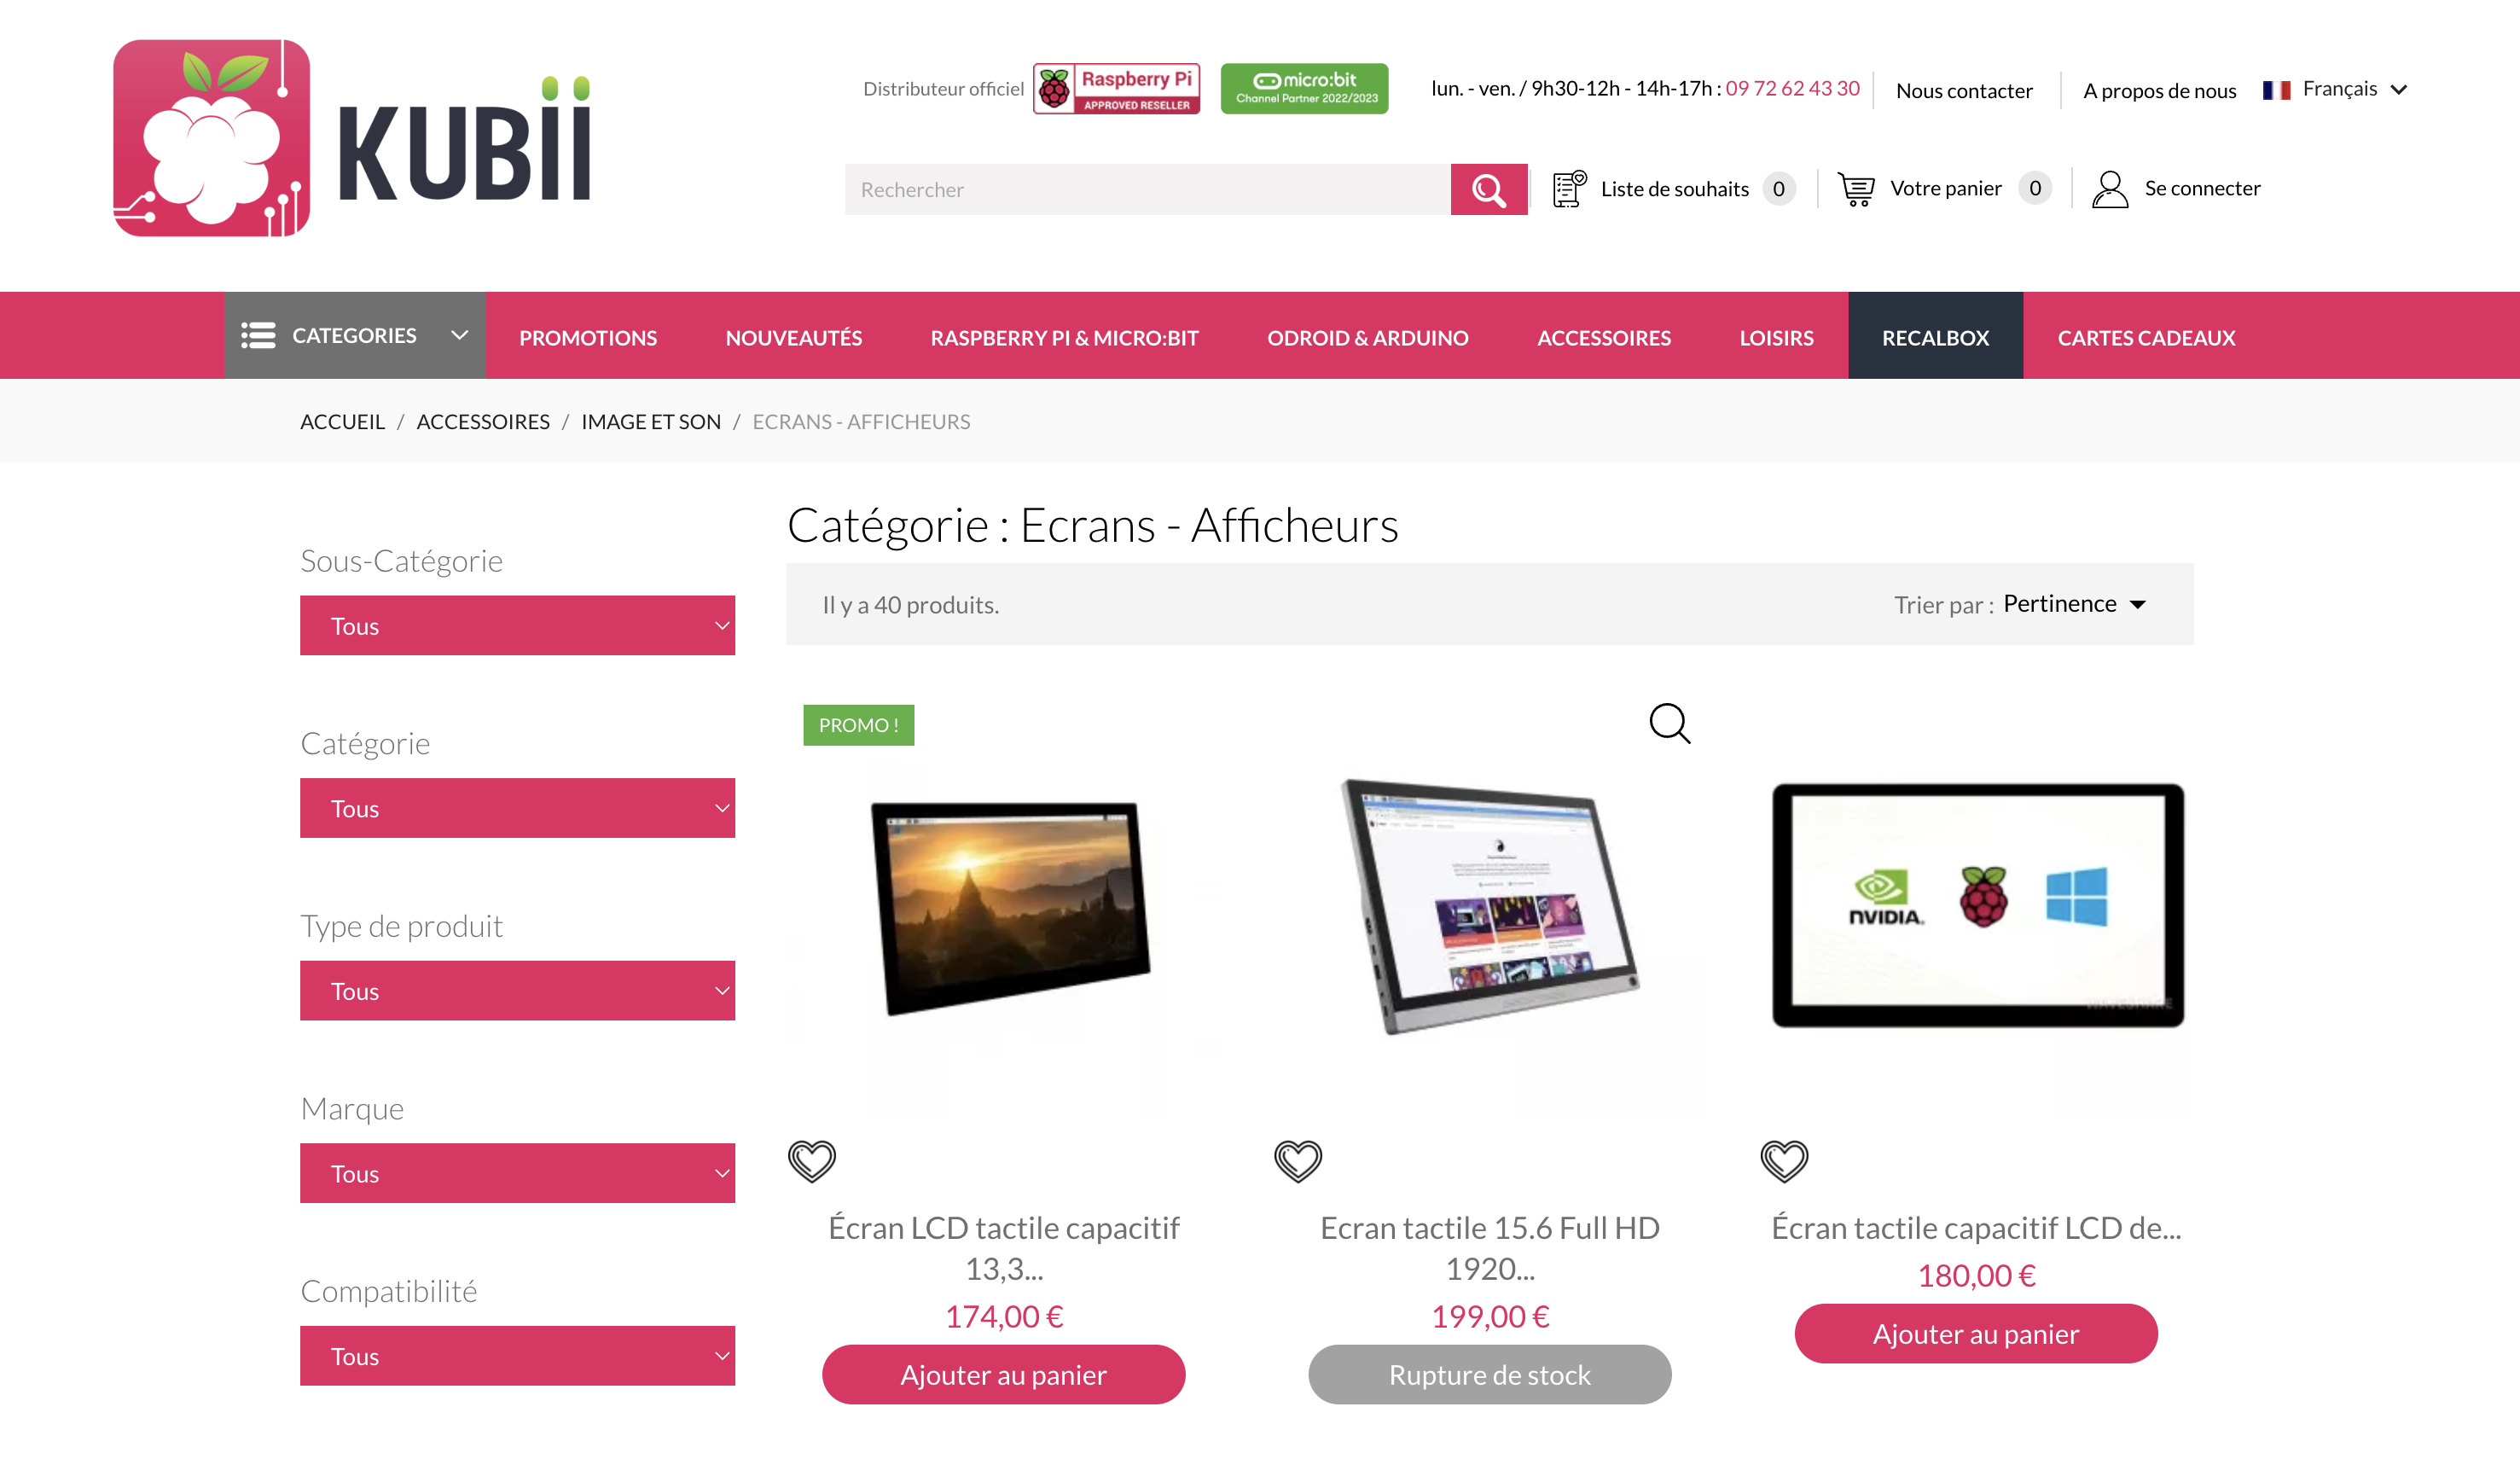
One of the main sites to find hardware:
Challenges & Constraints
We are in a 100% offline context, so we need to maximize the performance of our embedded system by focusing on:
- CPU & RAM optimization
- Multiprocessing to run multiple tasks in parallel
- Choosing the right video resolution to avoid overloading the processing
- Reducing latency for optimal response time
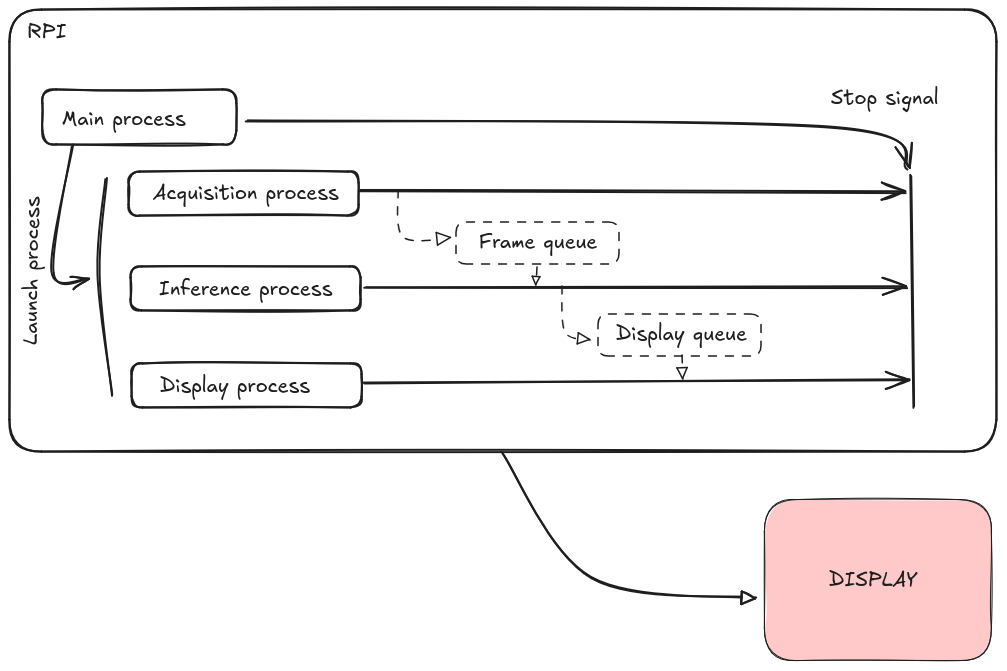
Workshop Steps
We will design a program divided into several modules, each running in parallel using multiprocessing.
Step 1: Creating Modules
- Video Acquisition
- Capture the continuous video stream.
- Inference with YOLO
- Detect human intrusion using a YOLO model.
- Alert on Intrusion
- If a person is detected, display a message.
- Real-Time Display
- Show the video with bounding boxes around intruders.
Step 2: Setting Up the Environment
- Create a virtual environment to isolate dependencies:
In your terminal:
python -m venv ENV_NAME
- Install the required libraries (
opencv,ultralytics,picamera2)
In your venv:
pip install -r requirements.txt
Here is the content of the requirements.txt file:
ultralytics
opencv-python
websockets
picamera2
fastapi
uvicorn
streamlit
Step 3: Multiprocessing in Action
We will run each module in a separate process to optimize the processing of the video stream in real-time!
Here is a possible code structure:
import multiprocessing
import cv2
from ultralytics import YOLO
from picamera2 import Picamera2
from multiprocessing import Queue
import numpy as np

def acquisition(queue: Queue) -> None:
    """
    Capture images from the Raspberry Pi camera and place them in a queue.

    Args:
        queue (Queue): Queue to store captured images.
    """
    picam2 = Picamera2()
    picam2.configure(picam2.create_preview_configuration(main={"size": (640, 640)}))
    picam2.start()

    while True:
        frame = picam2.capture_array()
        frame = cv2.cvtColor(frame, cv2.COLOR_BGR2RGB)
        queue.put(frame)

def inference(frame_queue: Queue, alert_queue: Queue, display_queue: Queue) -> None:
    """
    Perform inference with YOLOv8 to detect objects and send results.

    Args:
        frame_queue (Queue): Queue containing images to process.
        alert_queue (Queue): Queue to send alerts if a person is detected.
        display_queue (Queue): Queue to display annotated images.
    """
    model = YOLO("yolov8n.pt")  # Load the YOLOv8 model
    while True:
        frame = frame_queue.get()  # Get an image from the queue
        results = model(frame)  # Detect objects

        # Create a copy of the image to show only people
        frame_persons = frame.copy()

        for result in results:
            for box in result.boxes:
                cls = int(box.cls[0])  # Class of the detected object
                if cls == 0:  # Class 0 = person
                    alert_queue.put("Person detected!")
                    # Draw bounding boxes only around people
                    x1, y1, x2, y2 = map(int, box.xyxy[0])  # Box coordinates
                    cv2.rectangle(frame_persons, (x1, y1), (x2, y2), (0, 255, 0), 2)
                    cv2.putText(frame_persons, "Person", (x1, y1 - 10), cv2.FONT_HERSHEY_SIMPLEX, 0.5, (0, 255, 0), 2)

        display_queue.put(frame_persons)

def display_results(display_queue: Queue) -> None:
    """
    Display the results of the detection in real-time.

    Args:
        display_queue (Queue): Queue containing annotated images to display.
    """
    cv2.namedWindow("Person Detection", cv2.WINDOW_NORMAL)

    while True:
        frame = display_queue.get()
        cv2.imshow("Person Detection", frame)

        if cv2.waitKey(1) & 0xFF == ord('q'):
            break
    cv2.destroyAllWindows()

def alert_system(alert_queue: Queue) -> None:
    """
    Handle alerts when a person is detected.

    Args:
        alert_queue (Queue): Queue containing alert messages.
    """
    while True:
        message = alert_queue.get()
        print(f"WARNING {message}")

if __name__ == "__main__":
    frame_queue: Queue = multiprocessing.Queue()
    alert_queue: Queue = multiprocessing.Queue()
    display_queue: Queue = multiprocessing.Queue()

    p1 = multiprocessing.Process(target=acquisition, args=(frame_queue,))
    p2 = multiprocessing.Process(target=inference, args=(frame_queue, alert_queue, display_queue))
    p3 = multiprocessing.Process(target=alert_system, args=(alert_queue,))
    p4 = multiprocessing.Process(target=display_results, args=(display_queue,))

    p1.start()
    p2.start()
    p3.start()
    p4.start()

    p1.join()
    p2.join()
    p3.join()
    p4.join()
Expected Results
- The camera captures a continuous video stream
- YOLO inference detects a human presence
- An alert is sent as soon as an intrusion is detected
- Everything runs in parallel and in real-time
Conclusion & Improvements
Bravo! You have set up a real-time surveillance system on an embedded device!
Possible Improvements:
- Optimize memory management to prevent leaks.
- Resize images to reduce processing load.
- Apply quantization to speed up inference.
- Add a server mode to send alerts over a local network.
BONUS: What is Quantization in AI?
Quantization is a technique used in artificial intelligence, particularly to optimize deep learning models so they run more efficiently on resource-limited devices.
A deep learning model uses:
- weights
- activations
All represented as float32 (32 bits).
Quantization reduces the precision of these values by converting them to int8 (8-bit integers), which decreases the model size and speeds up execution, while often maintaining acceptable performance.
Ultimately, we get a lighter model that is faster to load into RAM and infer.
Since we are using YOLO from the ultralytics library, let’s see how this applies to our case:
from ultralytics import YOLO

# Load the YOLO11 model
model = YOLO("yolo11n.pt")

# Export the model to NCNN format
model.export(format="ncnn")  # creates '/yolo11n_ncnn_model'

# Load the exported NCNN model
ncnn_model = YOLO("./yolo11n_ncnn_model")

# Run inference
results = ncnn_model("https://ultralytics.com/images/bus.jpg")
Try running this program again with our new network loaded!
Conclusion
You now have all the basics to deploy embedded AI on Raspberry Pi and other devices!