C# for Visual Studio Code
Introduction
This guide will help you set up your development environment for C# using Visual Studio Code. VS Code is a lightweight and powerful editor, ideal for cross-platform C# development.
Learning objectives:
- Install .NET SDK and Visual Studio Code
- Configure essential C# extensions
- Optimize your workflow with tools and shortcuts
Prerequisites & Installation
Prior knowledge
- None (beginner's guide)
Required tools
| Tool | Version | Link | Description |
|---|---|---|---|
| .NET SDK | 6.0+ | dotnet.microsoft.com | C# development platform |
| Visual Studio Code | Latest | code.visualstudio.com | Code editor |
Installing .NET SDK
The .NET SDK is a free, open-source development platform for building many different types of applications. It includes the C# compiler, the .NET runtime, and the ASP.NET Core runtime.
- Download the .NET SDK installer from the official website
- Run the installer and follow the instructions
- Verify the installation:
dotnet --version
Installing Visual Studio Code
Visual Studio Code is a free source code editor developed by Microsoft for Windows, Linux and macOS. It includes support for debugging, embedded Git control, syntax highlighting, intelligent code completion, snippets, and code refactoring.
Windows
-
Download the installer from code.visualstudio.com
-
Run the installer and follow the instructions
tipConsider checking the "Add 'Open with Code' action to Windows Explorer context menu" option for quick access.
-
Open Visual Studio Code
-
Enable auto-save:
File>Auto Save
MacOS
Option 1: Download
- Download from code.visualstudio.com
- Open the file and drag the Visual Studio Code icon to the Applications folder
Option 2: Homebrew
brew install --cask visual-studio-code
Configuration:
- Open Visual Studio Code
- Open the Command Palette (
Ctrl+Shift+PorCmd+Shift+P) - Type
shell commandand selectShell Command: Install 'code' command in PATH - Enable auto-save:
File>Auto Save
Linux
-
Download the installer from code.visualstudio.com/download (
.debor.rpmformat) -
Run the installer and follow the instructions
noteYou can also check the Visual Studio Code Insiders version for more availability.
-
Open Visual Studio Code
-
Install command in PATH: Command Palette (
Ctrl+Shift+P) →Shell Command: Install 'code' command in PATH -
Enable auto-save:
File>Auto Save
Installing essential C# extensions
The C# extension for Visual Studio Code adds complete support for C#, including syntax highlighting, IntelliSense (code completion), and debugging.
Install the following extensions from the Extensions sidebar (Ctrl+Shift+X):
| Extension | Description | Link |
|---|---|---|
| C# | Basic C# support | Marketplace |
| C# Extensions | Additional features | Marketplace |
| C# Dev Kit | Complete tool suite | Marketplace |
Advanced configuration (Bonus)
Recommended optional extensions
- CSharpier - Automatic code formatter
- tokyo-night - Color theme
- Reload - Quick window reload
CSharpier configuration (code formatter)
Install CSharpier globally:
dotnet tool install --global csharpier
Configure format on save:
-
Open keyboard shortcuts:
Ctrl+K Ctrl+S(orCmd+K Cmd+Son macOS)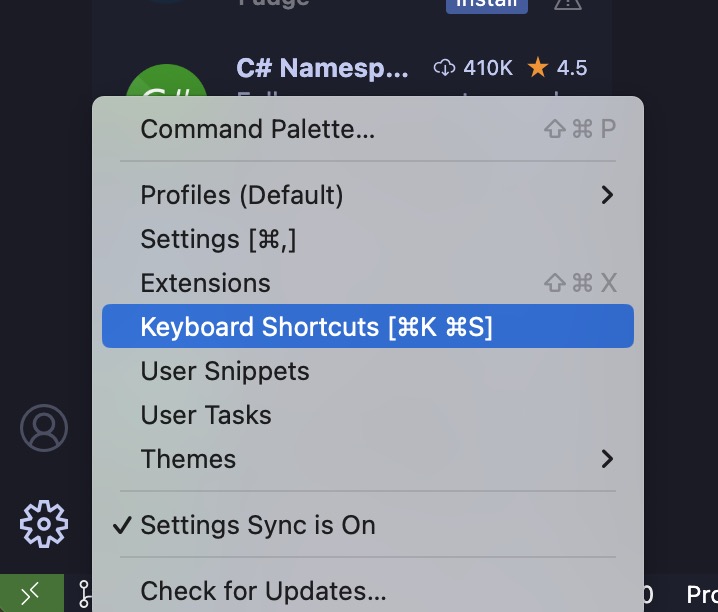
-
Search for
Format Document -
Set the keybinding to
Ctrl+S(orCmd+Son macOS)
-
Open a C# file and press
Ctrl+Sto automatically format
Automatic formatting on save saves you time and ensures consistent code across your team.
Resources
- Official VS Code documentation for C# - Complete Microsoft guide
- .NET CLI Reference - dotnet commands
- C# Programming Guide - Learn C#