Introduction to Sewing
This guide will accompany you in your first steps in sewing, from selecting tools to completing your first project.
Tools
There are many sewing tools available, but while many are very useful, only a handful are essential.
Essential tools
- Fabric
- Fabric scissors
- Pins or clips
- Tailor's chalk or heat-erasable fabric marker
- Thread
- A needle (hand sewing or machine for finishing)
For machine sewing, you will also need:
- Replacement needles suitable for your project
- Thread bobbins
Useful tools
- A measuring tape
- A seam ripper
- Something to iron with
The main steps of sewing
Choosing the pattern and fabric
A pattern is a guide for cutting your fabric correctly, it's a set of shapes that, once assembled, create a 3D garment.
The pattern almost always includes a seam allowance (a margin that allows you to sew the pieces together without "eating into" the volume of the garment) but it's always important to check because, if they're not included, the garment won't be the right size.
When you want to create a garment, everything starts with the pattern and the fabric. You must always choose the right one, each according to the other.
If you start with a fabric
If you find a beautiful denim fabric that you want to work with, you generally don't sew a t-shirt with it.
In this case, you'll find in a fabric store or online a pattern for a garment that could work with the nature of the fabric as well as the amount of fabric you have (jeans don't require as much fabric as a crop top).
If you start with a pattern or project idea (most common case)
When doing sewing, very often, we have a project in mind. You then need to find the pattern to complete this project.
In all cases, I advise you to take your measurements before you start and write them down. Here, you can find a list of useful measurements.
Here are the different methods for this:
1. Using a "ready-to-use" pattern
Often, these patterns can be found on the internet or in fabric stores.
If they are purchased in a fabric store, they are already printed and ready to be cut out.
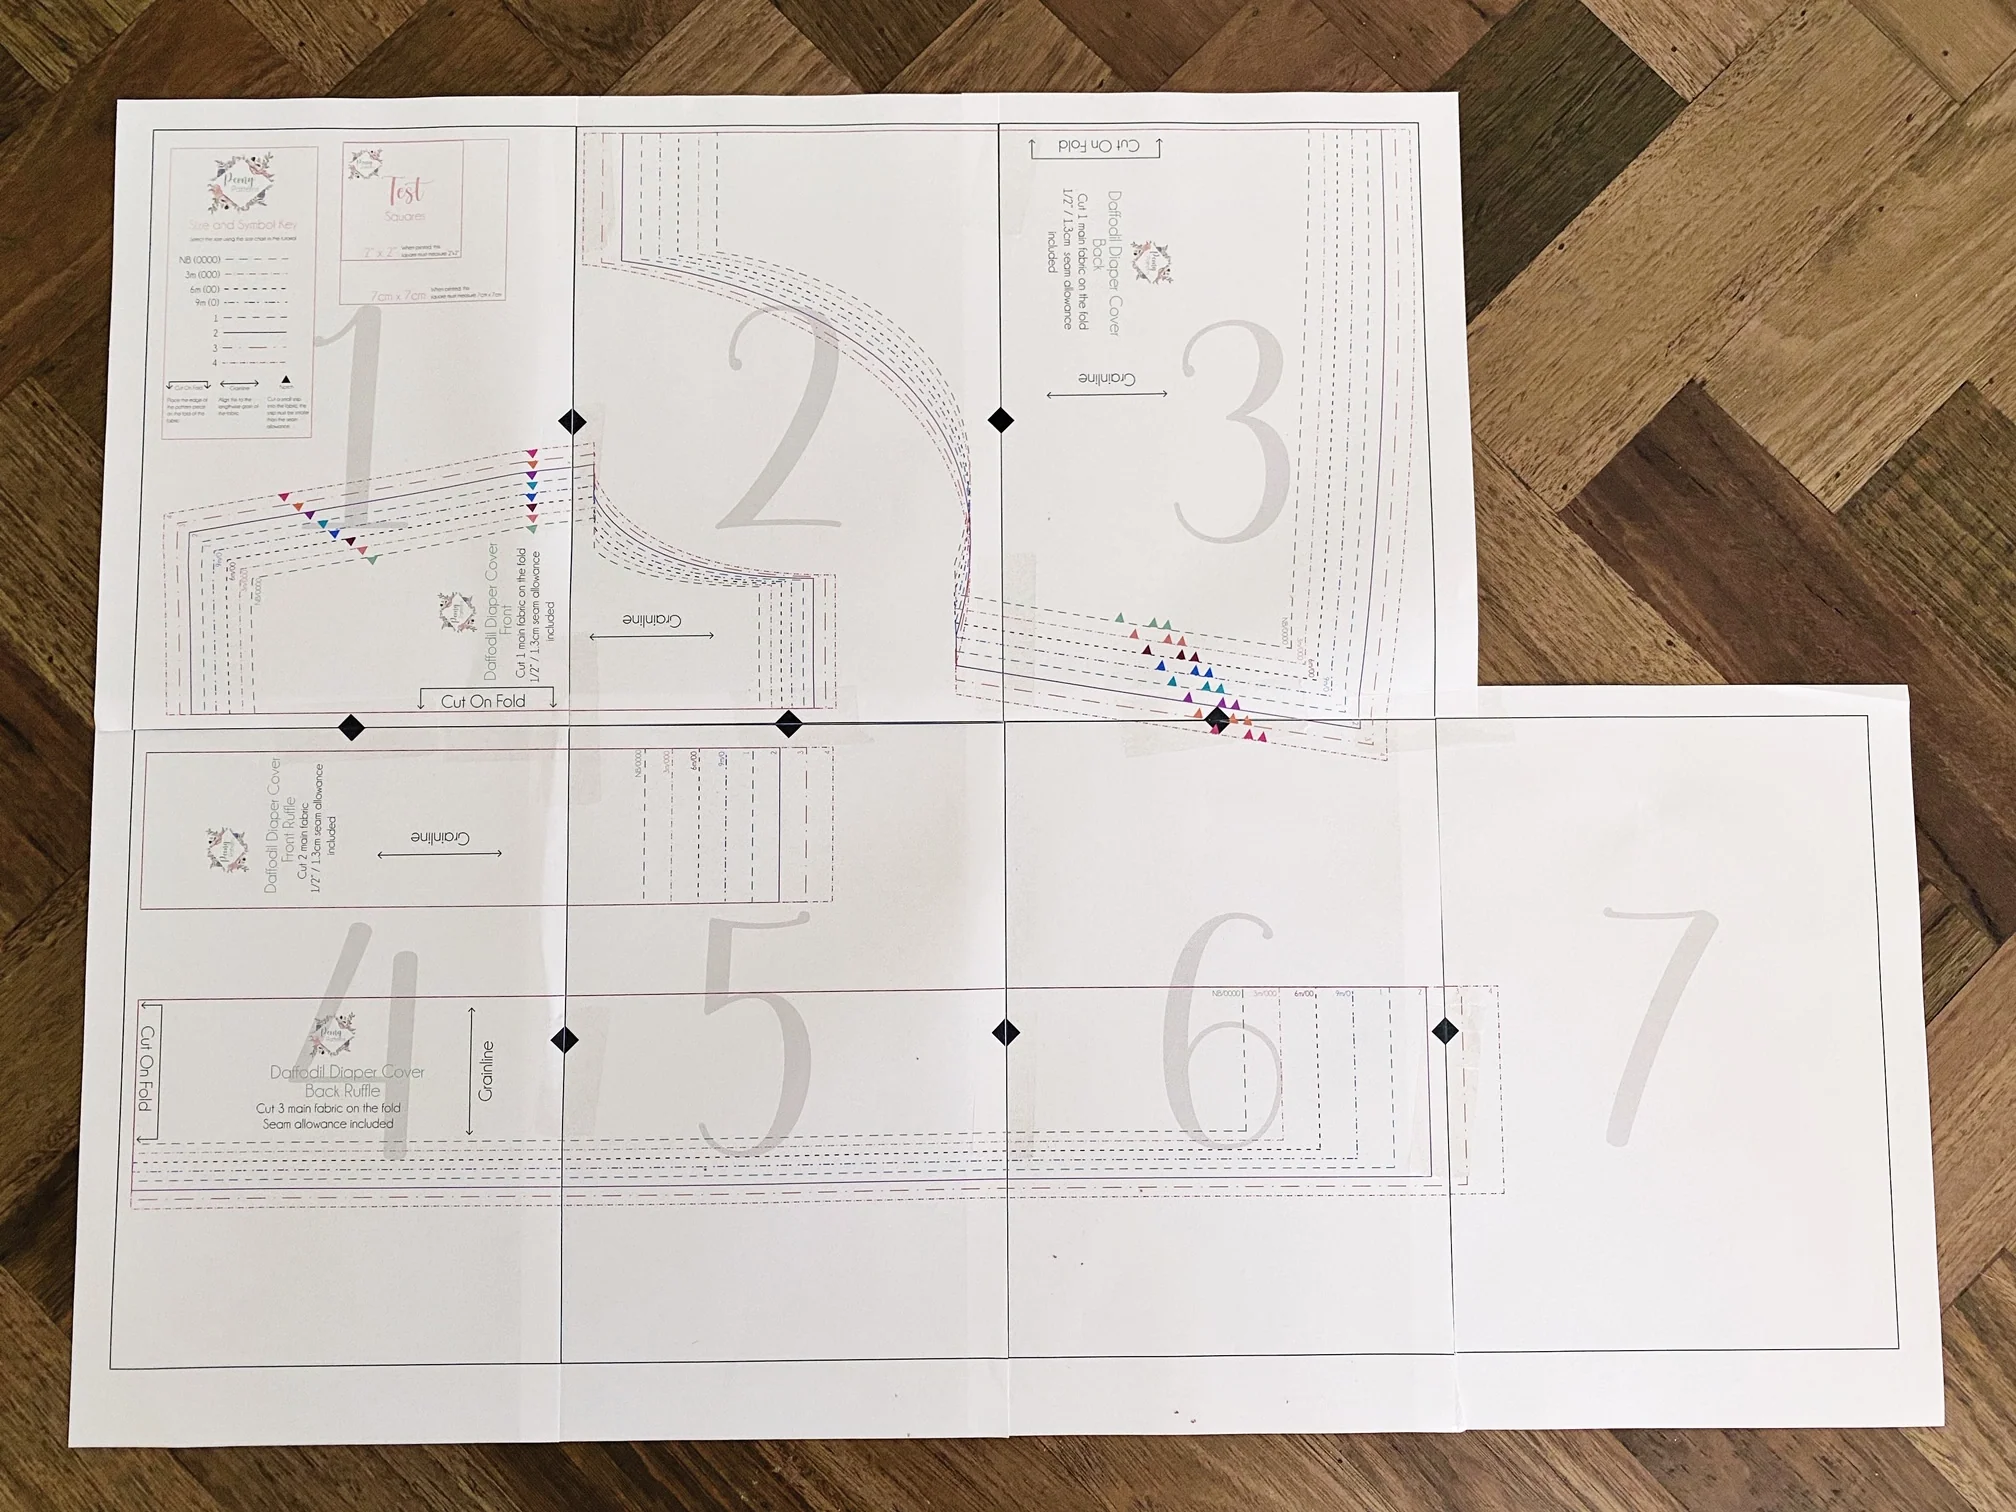
If they are found online, they often come as PDF files. You then generally need to print them page by page and assemble the pages following the guides.
In all cases, the pattern is composed of several lines with different patterns.
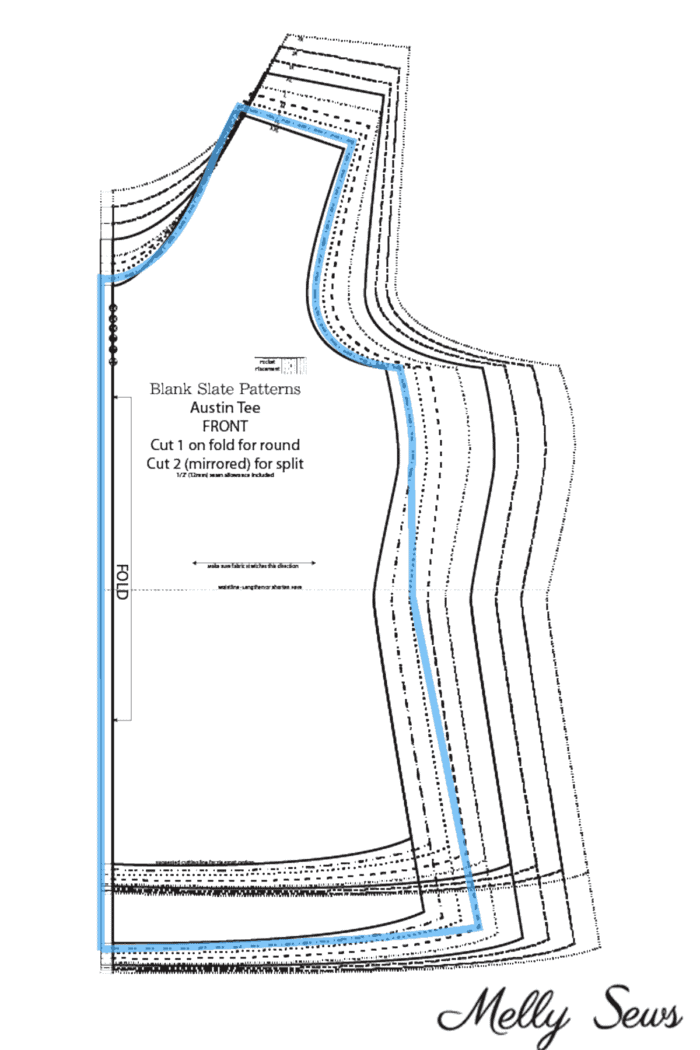
First, you need to determine the size you want to use.
Sewing sizes very often differ from store sizes, you're not the same size in ready-to-wear and in sewing!

Then you need to find which size corresponds to which pattern:

Then you can either:
- Cut out your pattern according to your size (if it's your pattern)
- Take a sheet of pattern paper and trace the pattern with a tracing wheel (if you want to be able to use multiple sizes or if you're using a fablab pattern) then cut out on the pattern paper.
2. Make your pattern
If you don't have a pattern that suits you, or the pattern you found doesn't exist in your size, you can always make your own pattern.
For this, you can use the following methods:
Flat pattern making
Either by following a list of instructions, or by creating it from scratch (I admire you if you can do that), you can draw your own pattern.
For this, you need:
- Pattern paper (or a roll of any large paper)
- A pencil
- An eraser
- A pen
- A set of sewing rulers (Japanese ruler, French curve, hip curve, etc.)
I strongly advise you to make your tracing in pencil and then, once finished, go over the important tracings with pen.
You can then cut it out.
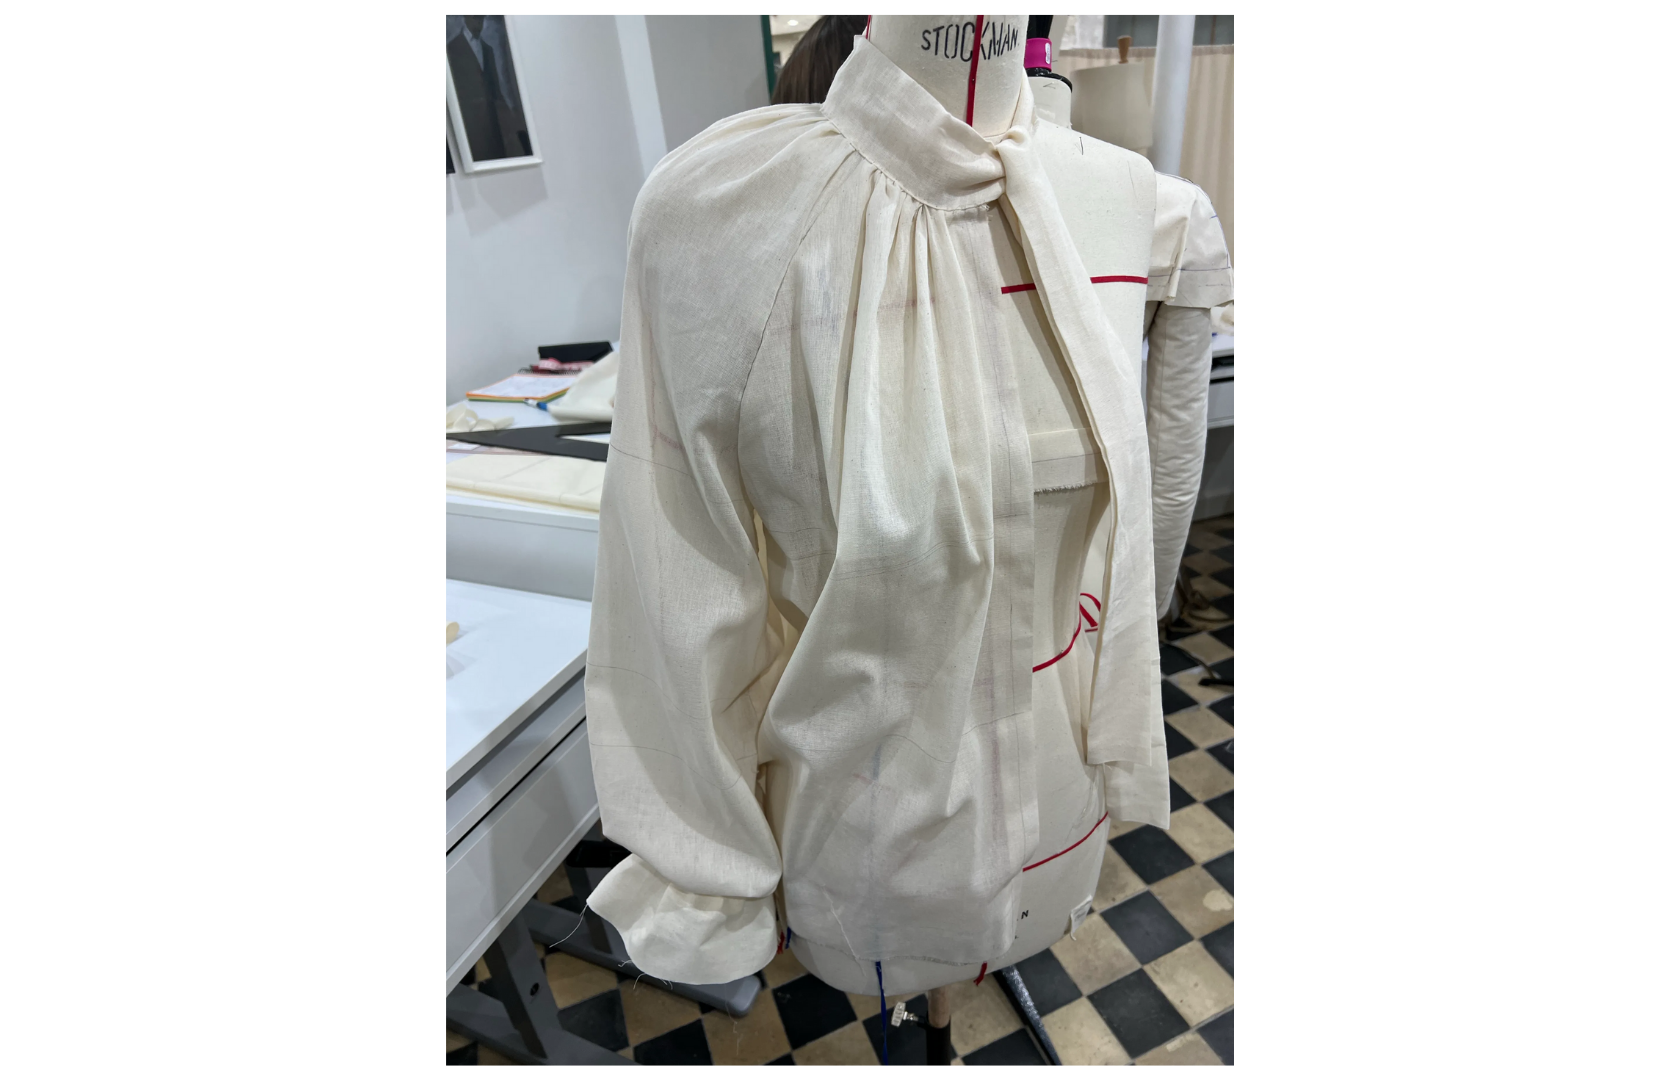
Draping
This is a haute couture technique that allows you to create a garment in three dimensions.
Draping is a method where you work directly in volume and where you create both the style and the pattern at the same time.
You proceed as follows: you give the desired shapes to the muslin on the dress form or a person.
For more info: How to make a garment using draping?
"Unconventional" techniques
Sometimes, you don't have a pattern and you want to avoid complex calculations or draping. In this case, two alternative techniques exist, but haute couture houses will judge you...:
Duct tape pattern
This method consists of wrapping yourself in cellophane over underwear or tight-fitting clothing, then wrapping yourself in painter's tape.
Then, you draw the shape of the garment you want to make, then carefully cut out the pattern to remove it (being careful not to cut your clothes).
Finally, you remove the excess tape and cellophane, then cut the pattern to obtain flat pieces.
For a more detailed explanation: How to Make Duct Tape Patterns for Cosplay // Sylvie Cosplay Tutorial Pt. 3
Pattern stealing
Yes, you read that right.
This method consists of reproducing a pattern from an existing garment. To do this, place a garment in your size on a piece of paper large enough, then trace around it leaving 1 or 2 cm of seam allowance.
For a more detailed explanation: How to Make Patterns from Your Clothes (CLONE YOUR WARDROBE) | WITHWENDY
Then, once you've chosen your pattern, you can choose your fabric. For this, you need to think about the structure your garment will have: rigid, tight-fitting, fluid, etc.
Once you have an idea, you can order fabric samples online or go to a fabric store to find the fabric that suits you!
Many patterns indicate the recommended fabric type as well as the recommended fabric quantity. Check before you start your calculations!
When you buy fabric, you need to buy the right amount for the project.
Fabric is sold either by the roll or as a remnant.
Remnants are pre-cut pieces of fabric that are often cheaper. Their dimensions are always indicated somewhere.
Rolls generally have a width close to 1.50 m. You then need to choose how many meters you want. For this, you have several methods:
- See if your pattern doesn't come with instructions
- Cut out your pattern and arrange it so it doesn't exceed the roll width, then measure the length you need
- Import your pattern at actual size into Illustrator or any other software that allows you to visualize the dimensions of your tracings, then create a rectangle that simulates the size of your roll
- In a store, you can also ask the seller's opinion by showing them the pattern visual and indicating your size.
The prototype
Almost systematically, your pattern will not be perfectly adapted to your body or that of your model (yes, even if you make it according to your measurements).
This is why, to ensure you don't cut expensive fabric for nothing, you assemble your piece for the first time in a cheaper fabric called muslin.
Concretely, this is the cheapest fabric you can find in the store.
Once you've prepared your pattern, regardless of the method, you must follow the provided instructions (if there are any) and assemble the fabric for the first time.
Very often, it's not necessary to sew the garment with the lining for the prototype, so you can ignore all the steps where it's mentioned.
Of course, you can always sew it with the lining if you want to practice and understand the pattern well.
I strongly advise you to sew the prototype with the largest stitch length so you can easily unpick if needed.
This step is crucial for two main reasons:
- Getting familiar with the pattern and verifying that you understand it well
- Adjusting the pattern according to your measurements
Once your piece is finished, try it on and observe it. You can then correct the problems directly on your pattern.
This is a concept that is learned with a lot of experience and sewing knowledge.
To get a good start and fairly solid foundations, I recommend this YouTube playlist: How to 'read the wrinkles' to know what pattern alterations you need to make!
When you've made your modifications, I advise you to make prototypes again until your garment is to your satisfaction.
Preparing for assembly
First of all, you must wash and iron your fabric for the first time. After the first wash, your fabric can change size and alter the final rendering of your garment if you wash it for the first time after having sewn it.
Before you start sewing, you MUST test your fabric if you've never worked with this material.
Cut a small square of fabric and sew a straight line. Observe your seam line.
Is the fabric stretched by the thread? Are there thread tangles accumulating on the back of your fabric? Does the line have skipped stitches?
All these points, and many others, are signs that your settings are wrong.
I advise you to search for your problem on Google if you don't know what's happening.
A few golden rules if everything isn't working as it should:
- Re-thread your machine and your bobbin
- Adjust your top tension
- Look for which stitch is suitable for your fabric
- Tighten the needle
- Change the needle
- On thin fabrics, sew with paper under your fabric that you can then tear off
Once you've prepared your fabric, you can move on to the final step.
Final assembly
This step is the one that requires the least thought once the preparation is complete.
You simply need to get your fabric, cut it according to the pattern, then assemble it.
Normally, if you've made your prototype correctly, you won't need to adjust it. However, mistakes happen.
If you have things to fix on the final piece, this time you'll need to look into alterations.
This video: A Step-By-Step Method to Tailor Clothes - for BEGINNERS | DIY Sewing Alteration Tutorial offers a good general approach. However, for optimal results, I advise you to look for tutorials specific to your garment.
Practical exercise
Normally, you have all the keys in hand to start learning the technique!
For your first sewing project, you can make a zippered pouch. This is an ideal project for beginners because it allows you to practice:
- Cutting fabric
- Sewing in a straight line
- Installing a zipper
Follow this detailed tutorial: How to Sew a Zipper Pouch Tutorial
Resources
Body measurements
Video tutorials
- Reading wrinkles and adjustments
- Duct tape pattern for cosplay
- Reproducing a pattern from a garment
- Alterations for beginners
Technical articles
Next steps
Once you master the basics presented in this guide, you can:
- Experiment with different types of fabrics
- Learn advanced techniques (buttonholes, bias tape application, etc.)
- Create your own custom patterns